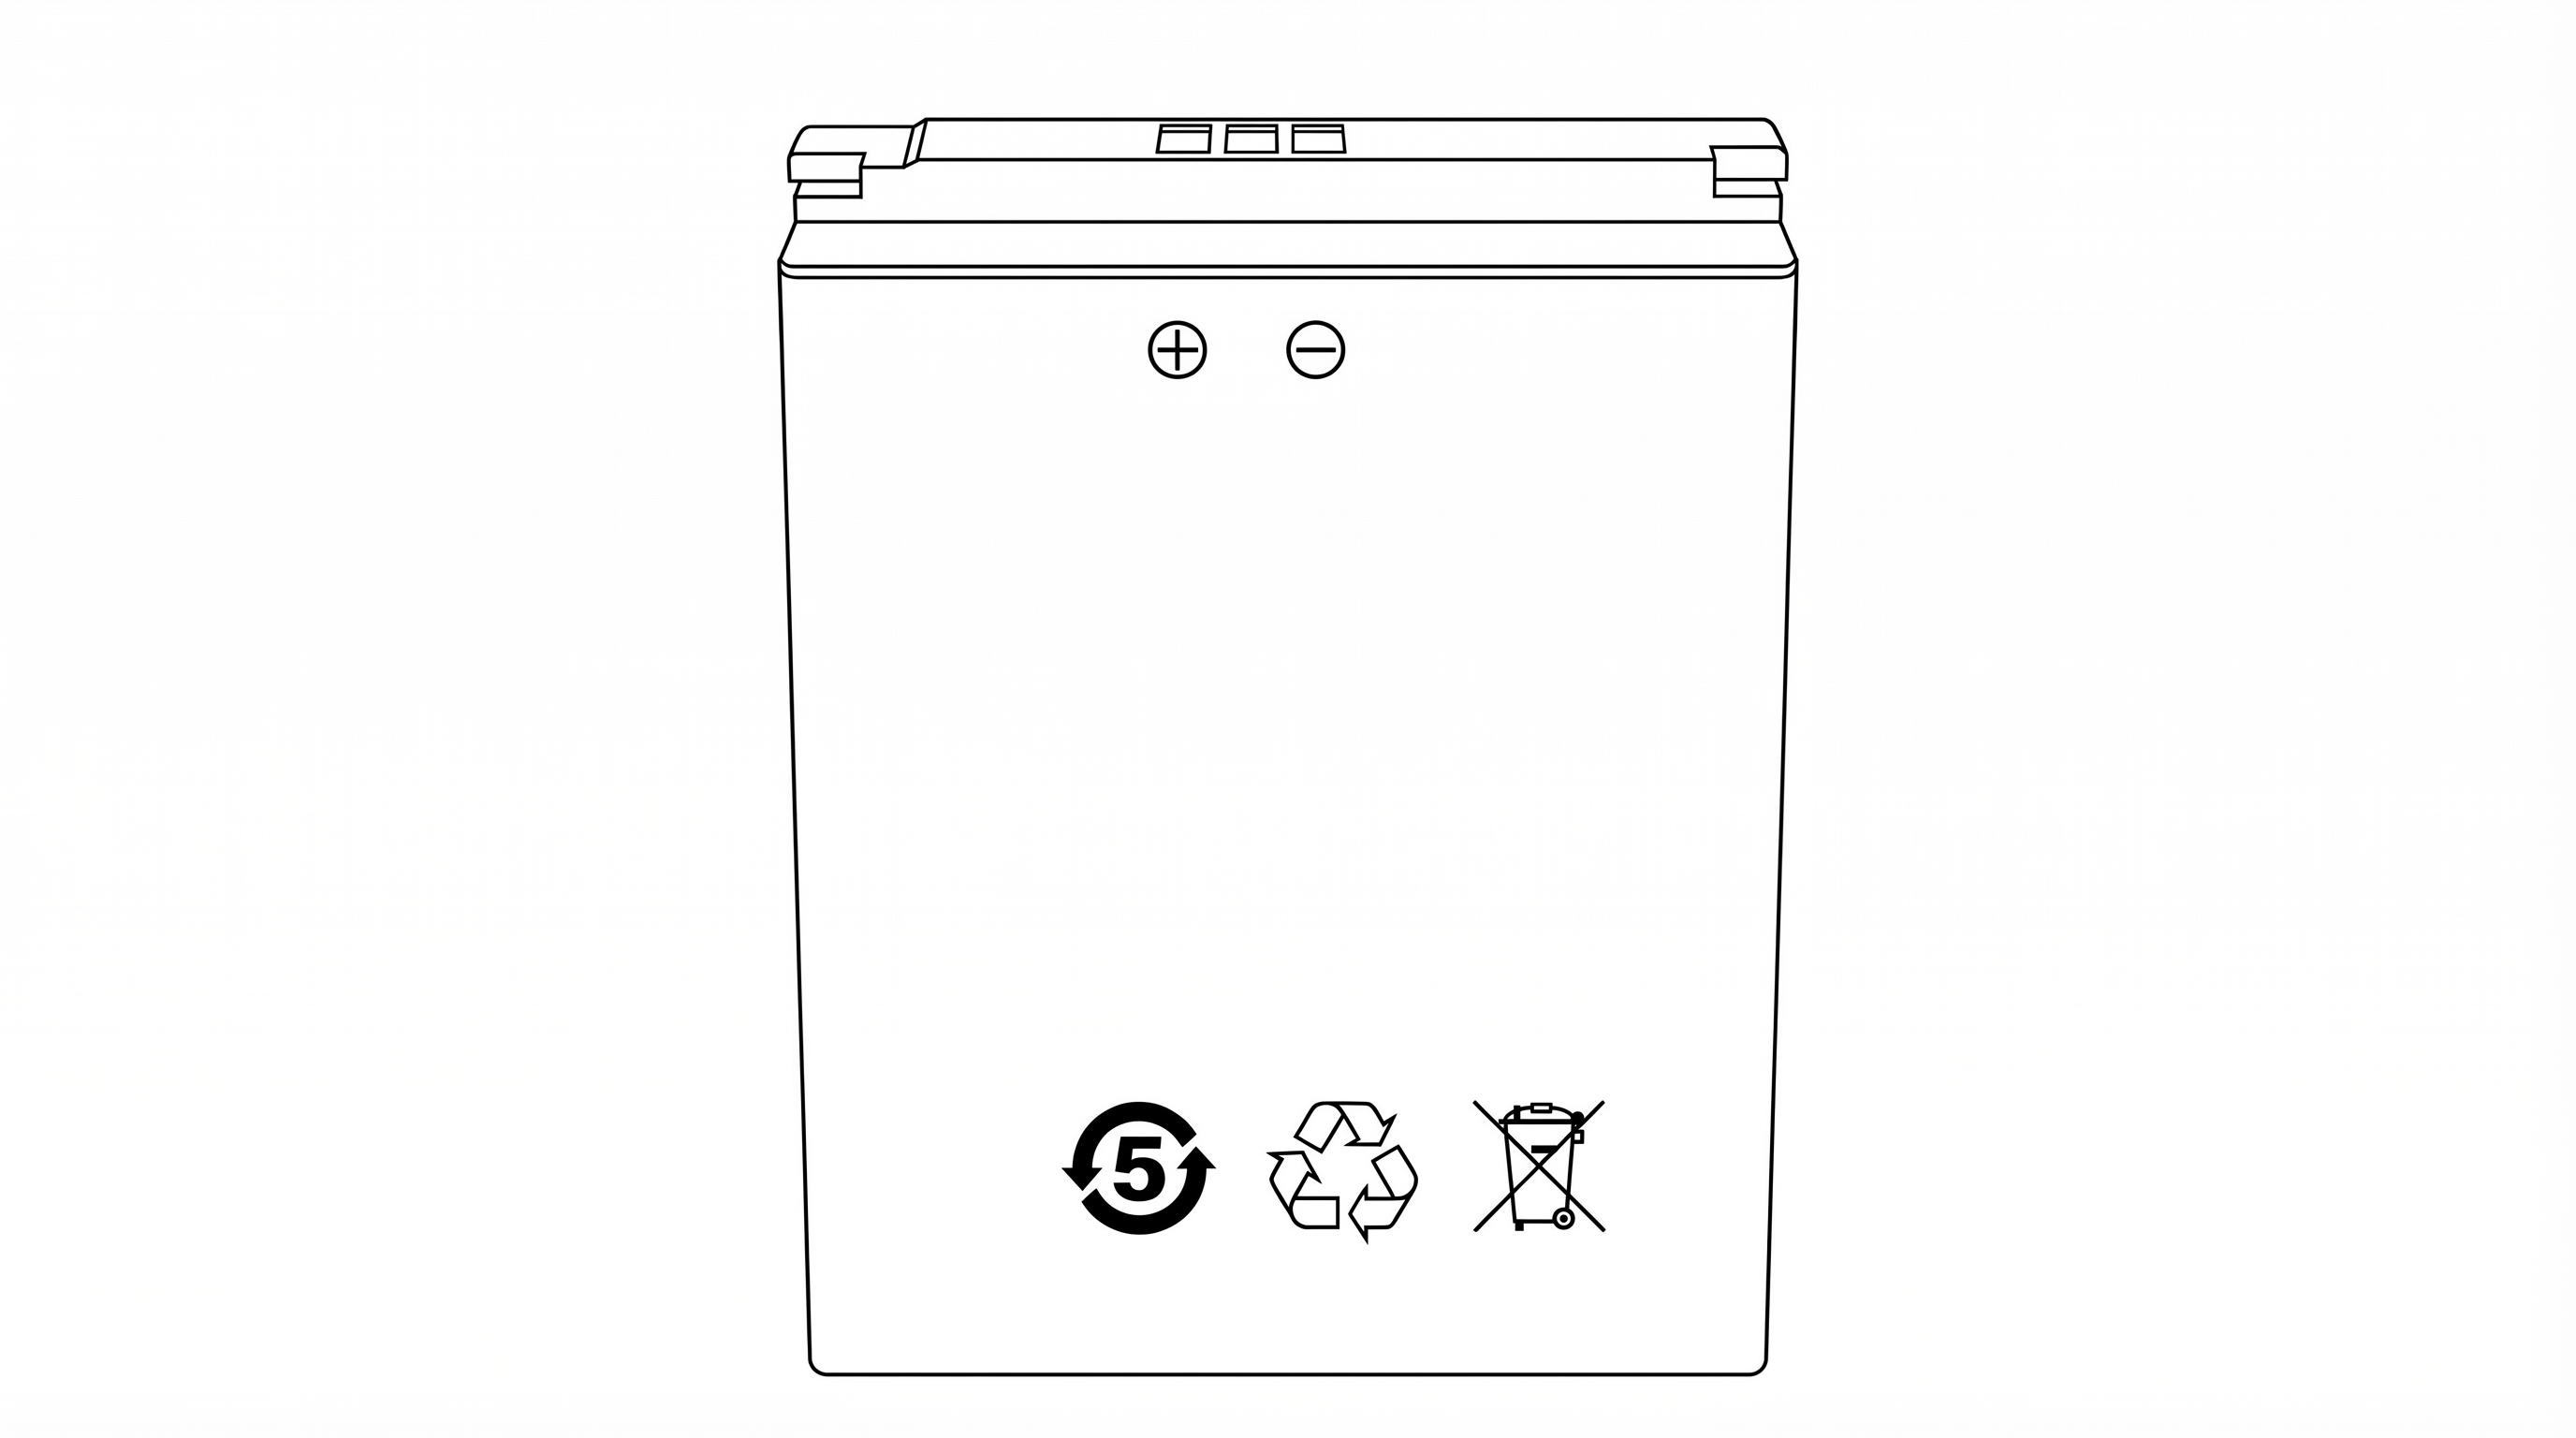
Body Worn Camera
User Manual
2843 E. Robin Lane
Phoenix, AZ 85050 USA
Table of Contents
- Product Overview
- Package Contents
- Device Description
- Getting Started
- Wearing the Camera
- Basic Operation
- LED Indicator Reference
- Button Reference
- Charging Cradle
- Technical Specifications
- Safety Warnings and Precautions
- FCC Regulatory Compliance
- RF Exposure Information (SAR)
- FCC Label Location
- Warranty and Support
1. Product Overview
The PATROL6 P1 is a professional body worn camera designed for law enforcement, security, and public safety personnel. It provides continuous HD video recording, real-time evidence upload over LTE cellular networks, and cloud-managed operation through the PATROL6 platform.
| Product Identification | |
|---|---|
| Product Name | Body Worn Camera |
| Model Number | P1 |
| Brand Name | Patrol 6 |
| FCC ID | 2BVFCP6-BC-V1 |
| Manufacturer | Patrol 6, Inc. |
| Address | 2843 E. Robin Lane, Phoenix, AZ 85050 USA |
2. Package Contents
Inspect the package upon receipt. Contact PATROL6 support if any items are missing or damaged.
| Item | Quantity |
|---|---|
| P1 Body Worn Camera | 1 |
| Rechargeable Lithium-Ion Battery (3200 mAh) | 2 |
| Charging Cradle (camera + spare battery) | 1 |
| USB Wall Charger (5V/2A) | 1 |
| USB-A to USB-C Charging Cable | 1 |
| Rotating Alligator Clip (chest mount) | 1 |
| Vest Clip | 1 |
| Quick Start Guide and User Manual Card (QR code and URL to full online manual) | 1 |
3. Device Description
3.1 Front View
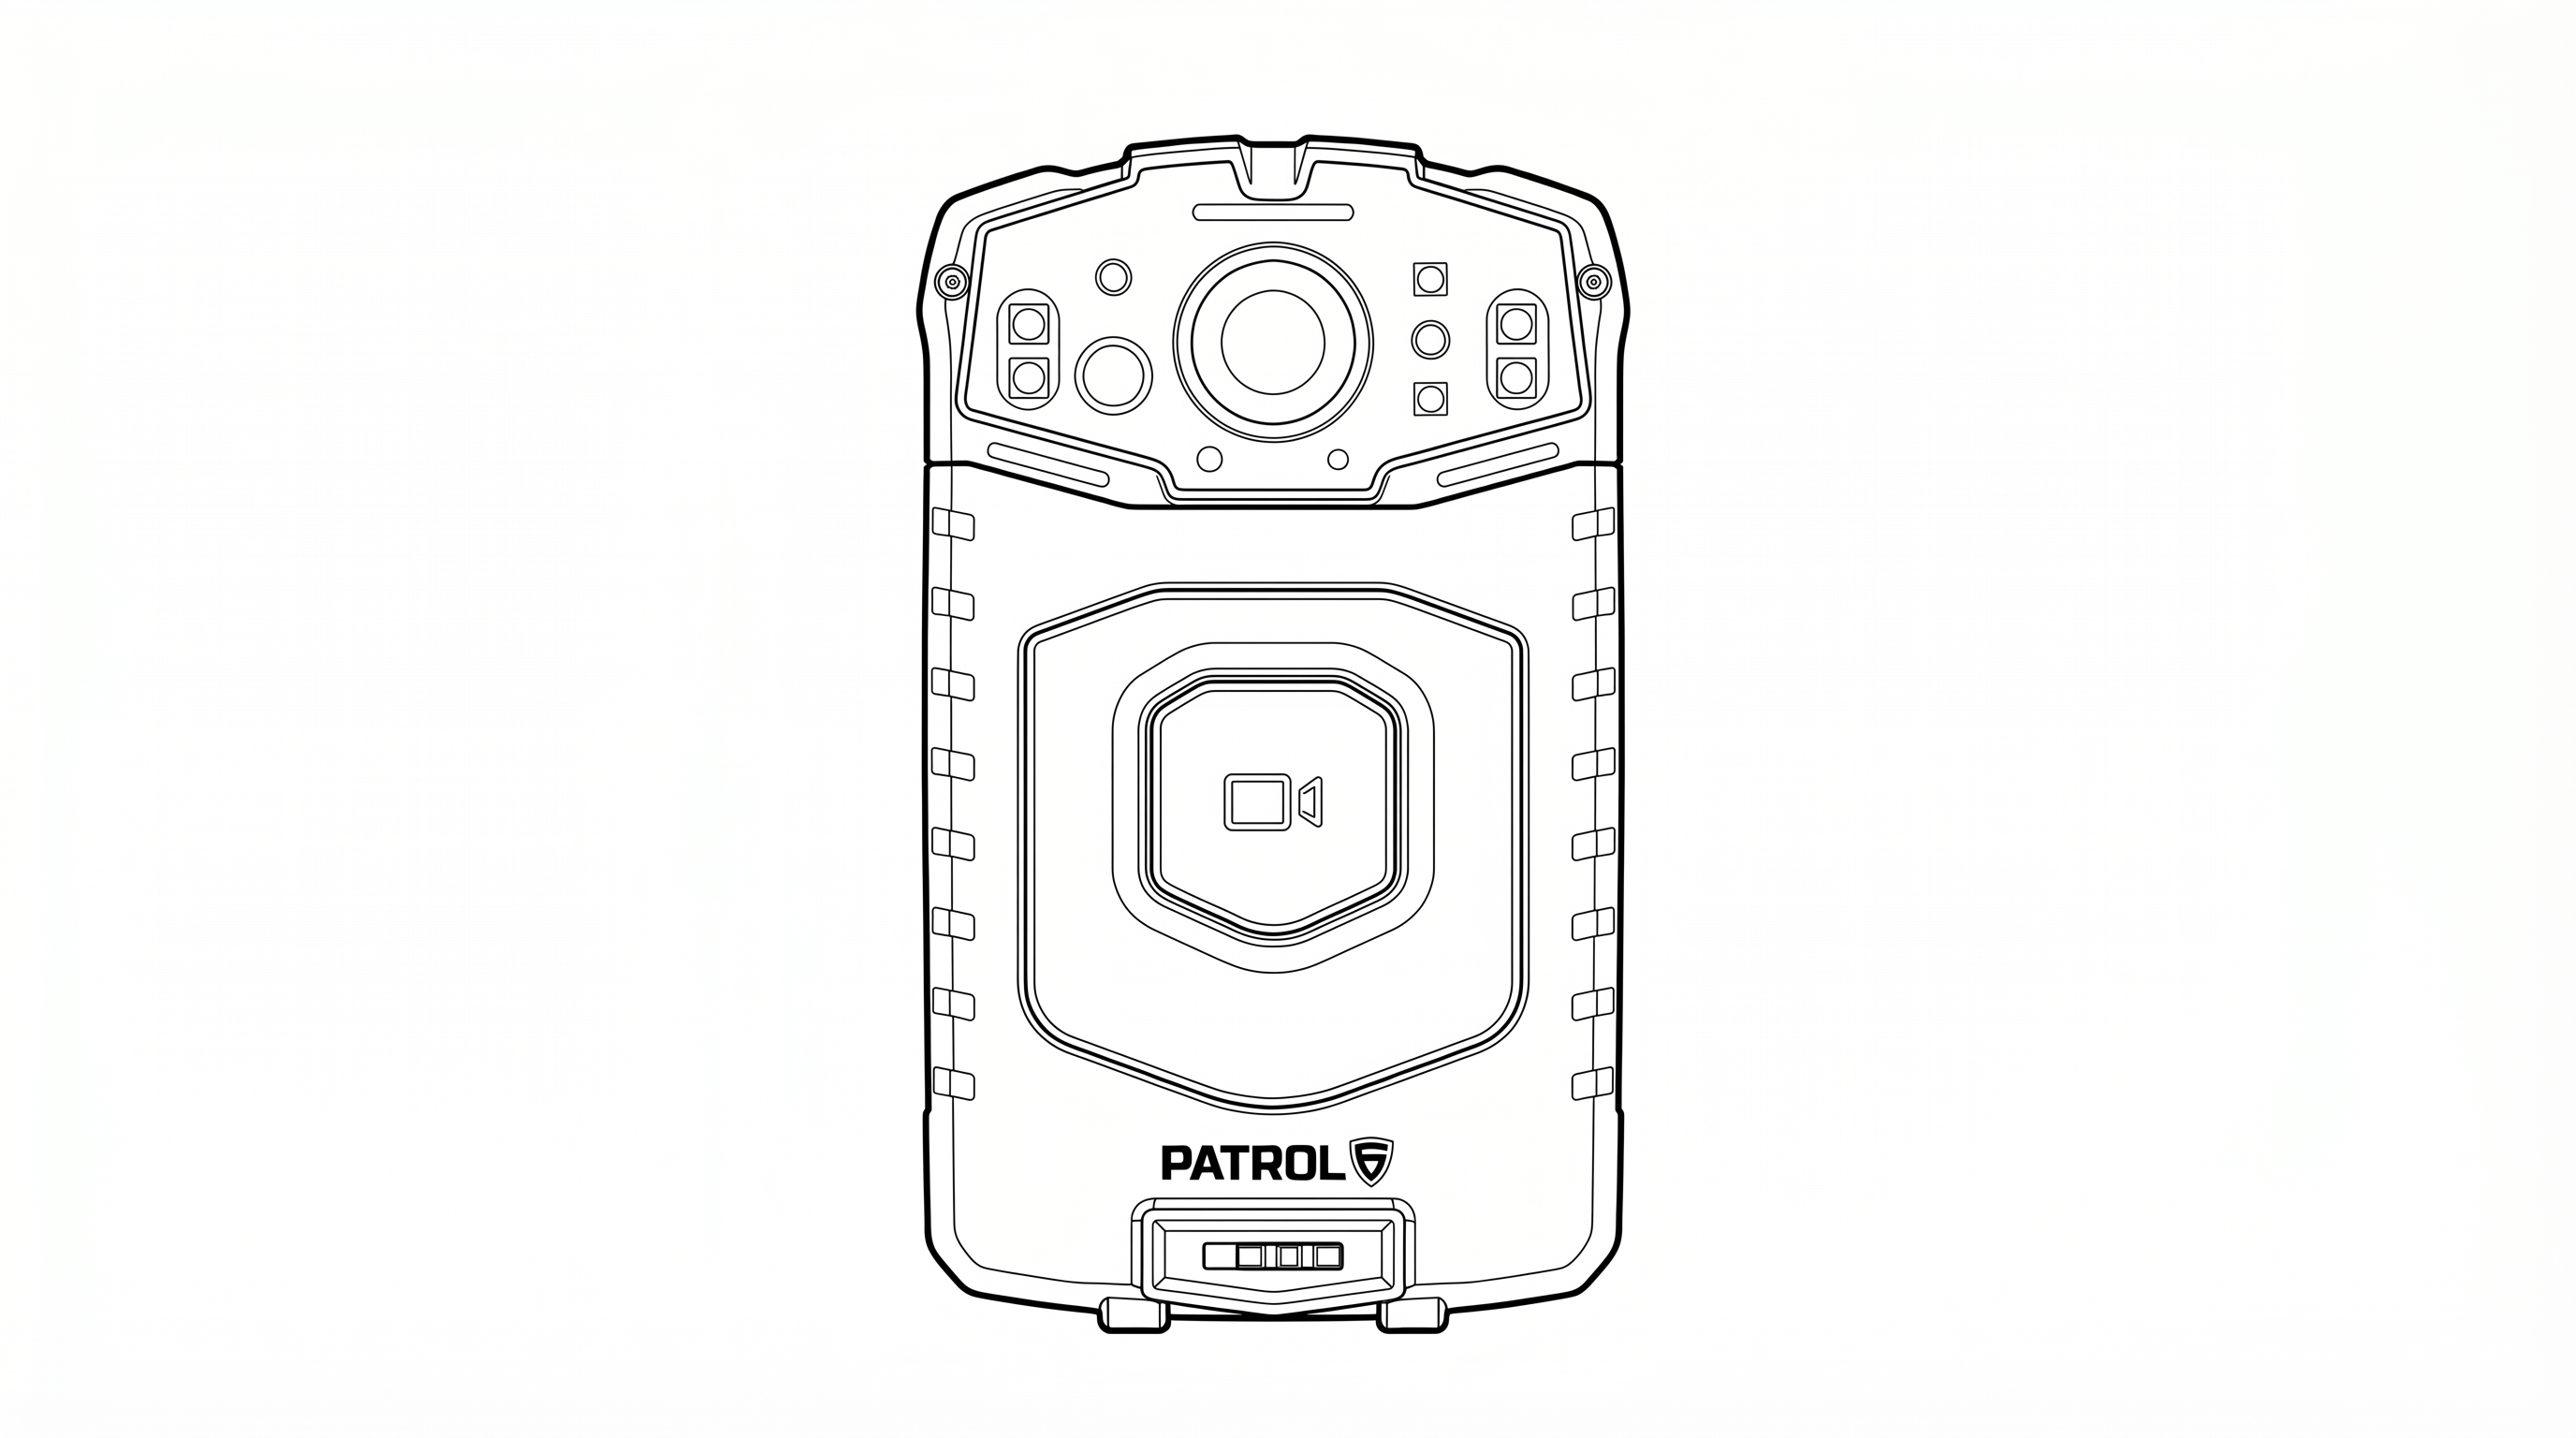
| Component | Description |
|---|---|
| Camera Lens | HD 120° wide-angle camera lens (top center) |
| IR LEDs | Infrared illuminators for night vision (flanking the lens) |
| Flash / White LED | Not used in current application |
| LED Indicators | Status LEDs indicating recording, charging, and device state |
| Main Button | Center button with video camera icon. Short press: LiveAI trigger. Long press: Start/Stop event recording |
| Patrol 6 Logo | Brand identification |
3.2 Right Side (USB Side)
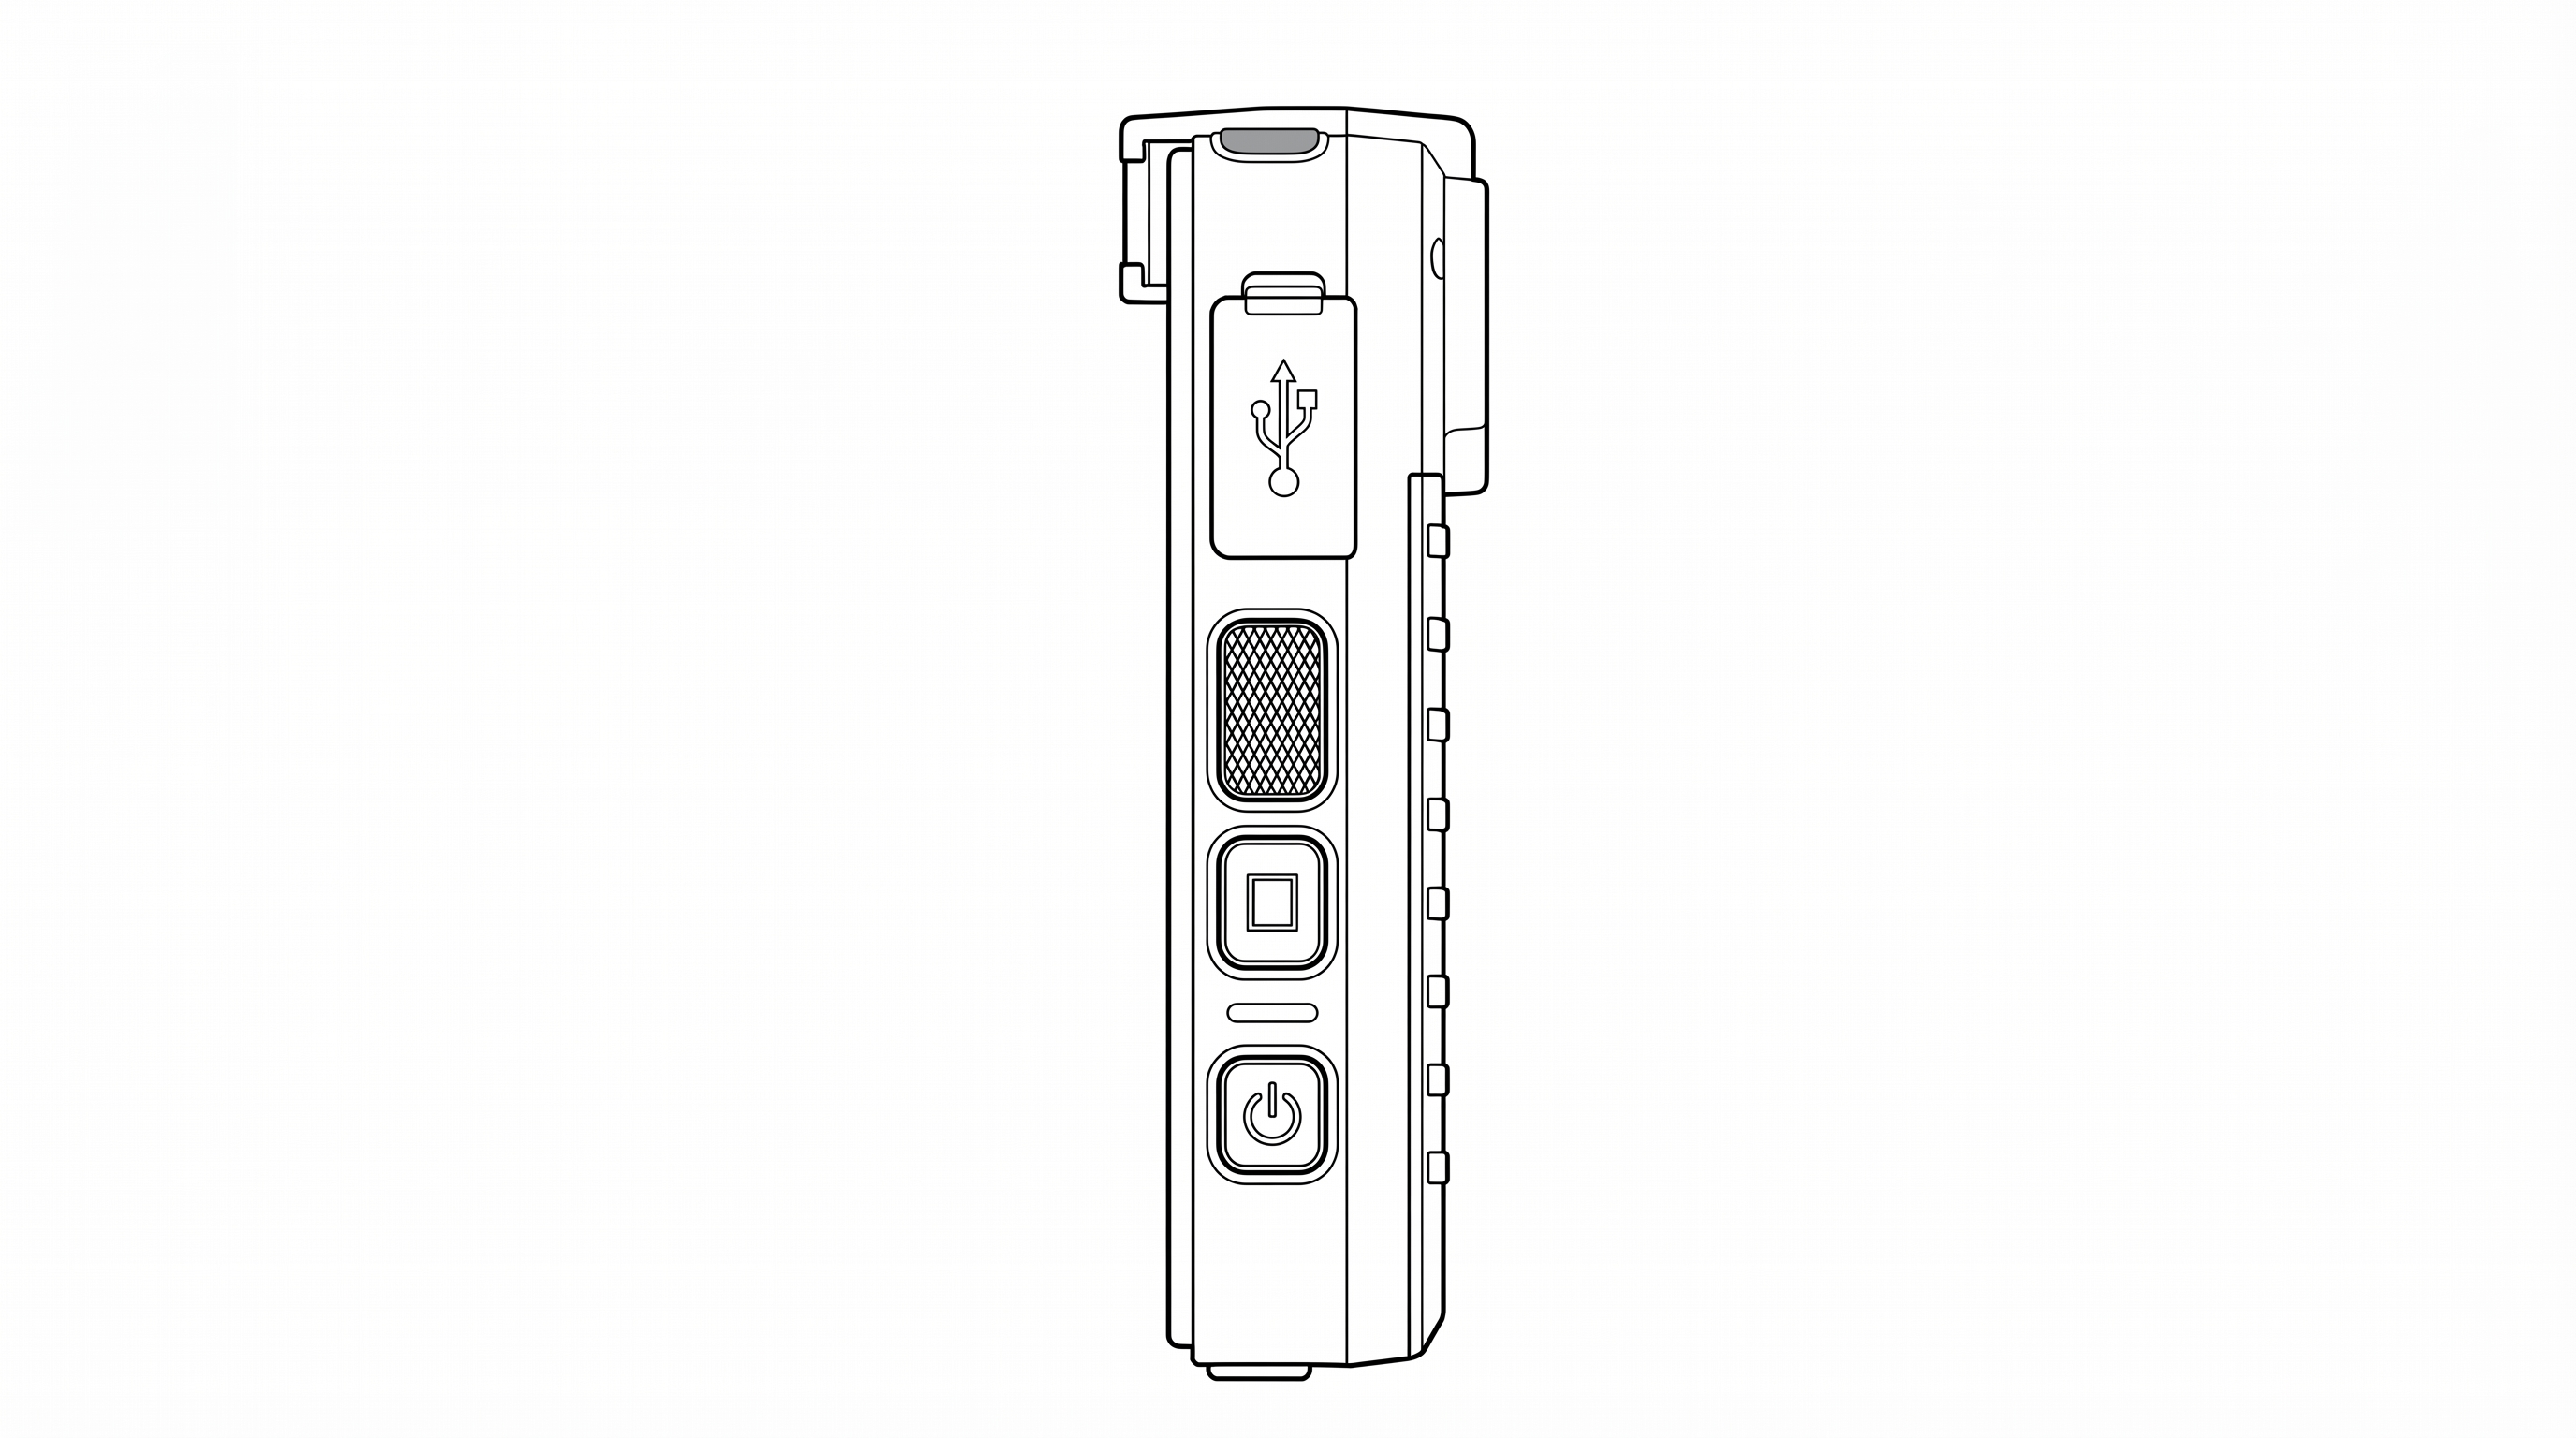
| Component | Description |
|---|---|
| USB-C Port | Behind protective flap (USB symbol on cover). For charging or data connection |
| Pause / Resume Button | Rectangular button. Short press: Pause recording. Long press: Resume recording |
| Snapshot Button | Short press: Capture a still photo. Long press: Toggle stealth mode on/off |
| Power Button | Bottom button with power icon. Short press: Screen sleep/wake. Long press: Power off / Reboot |
3.3 Left Side (SIM Side)
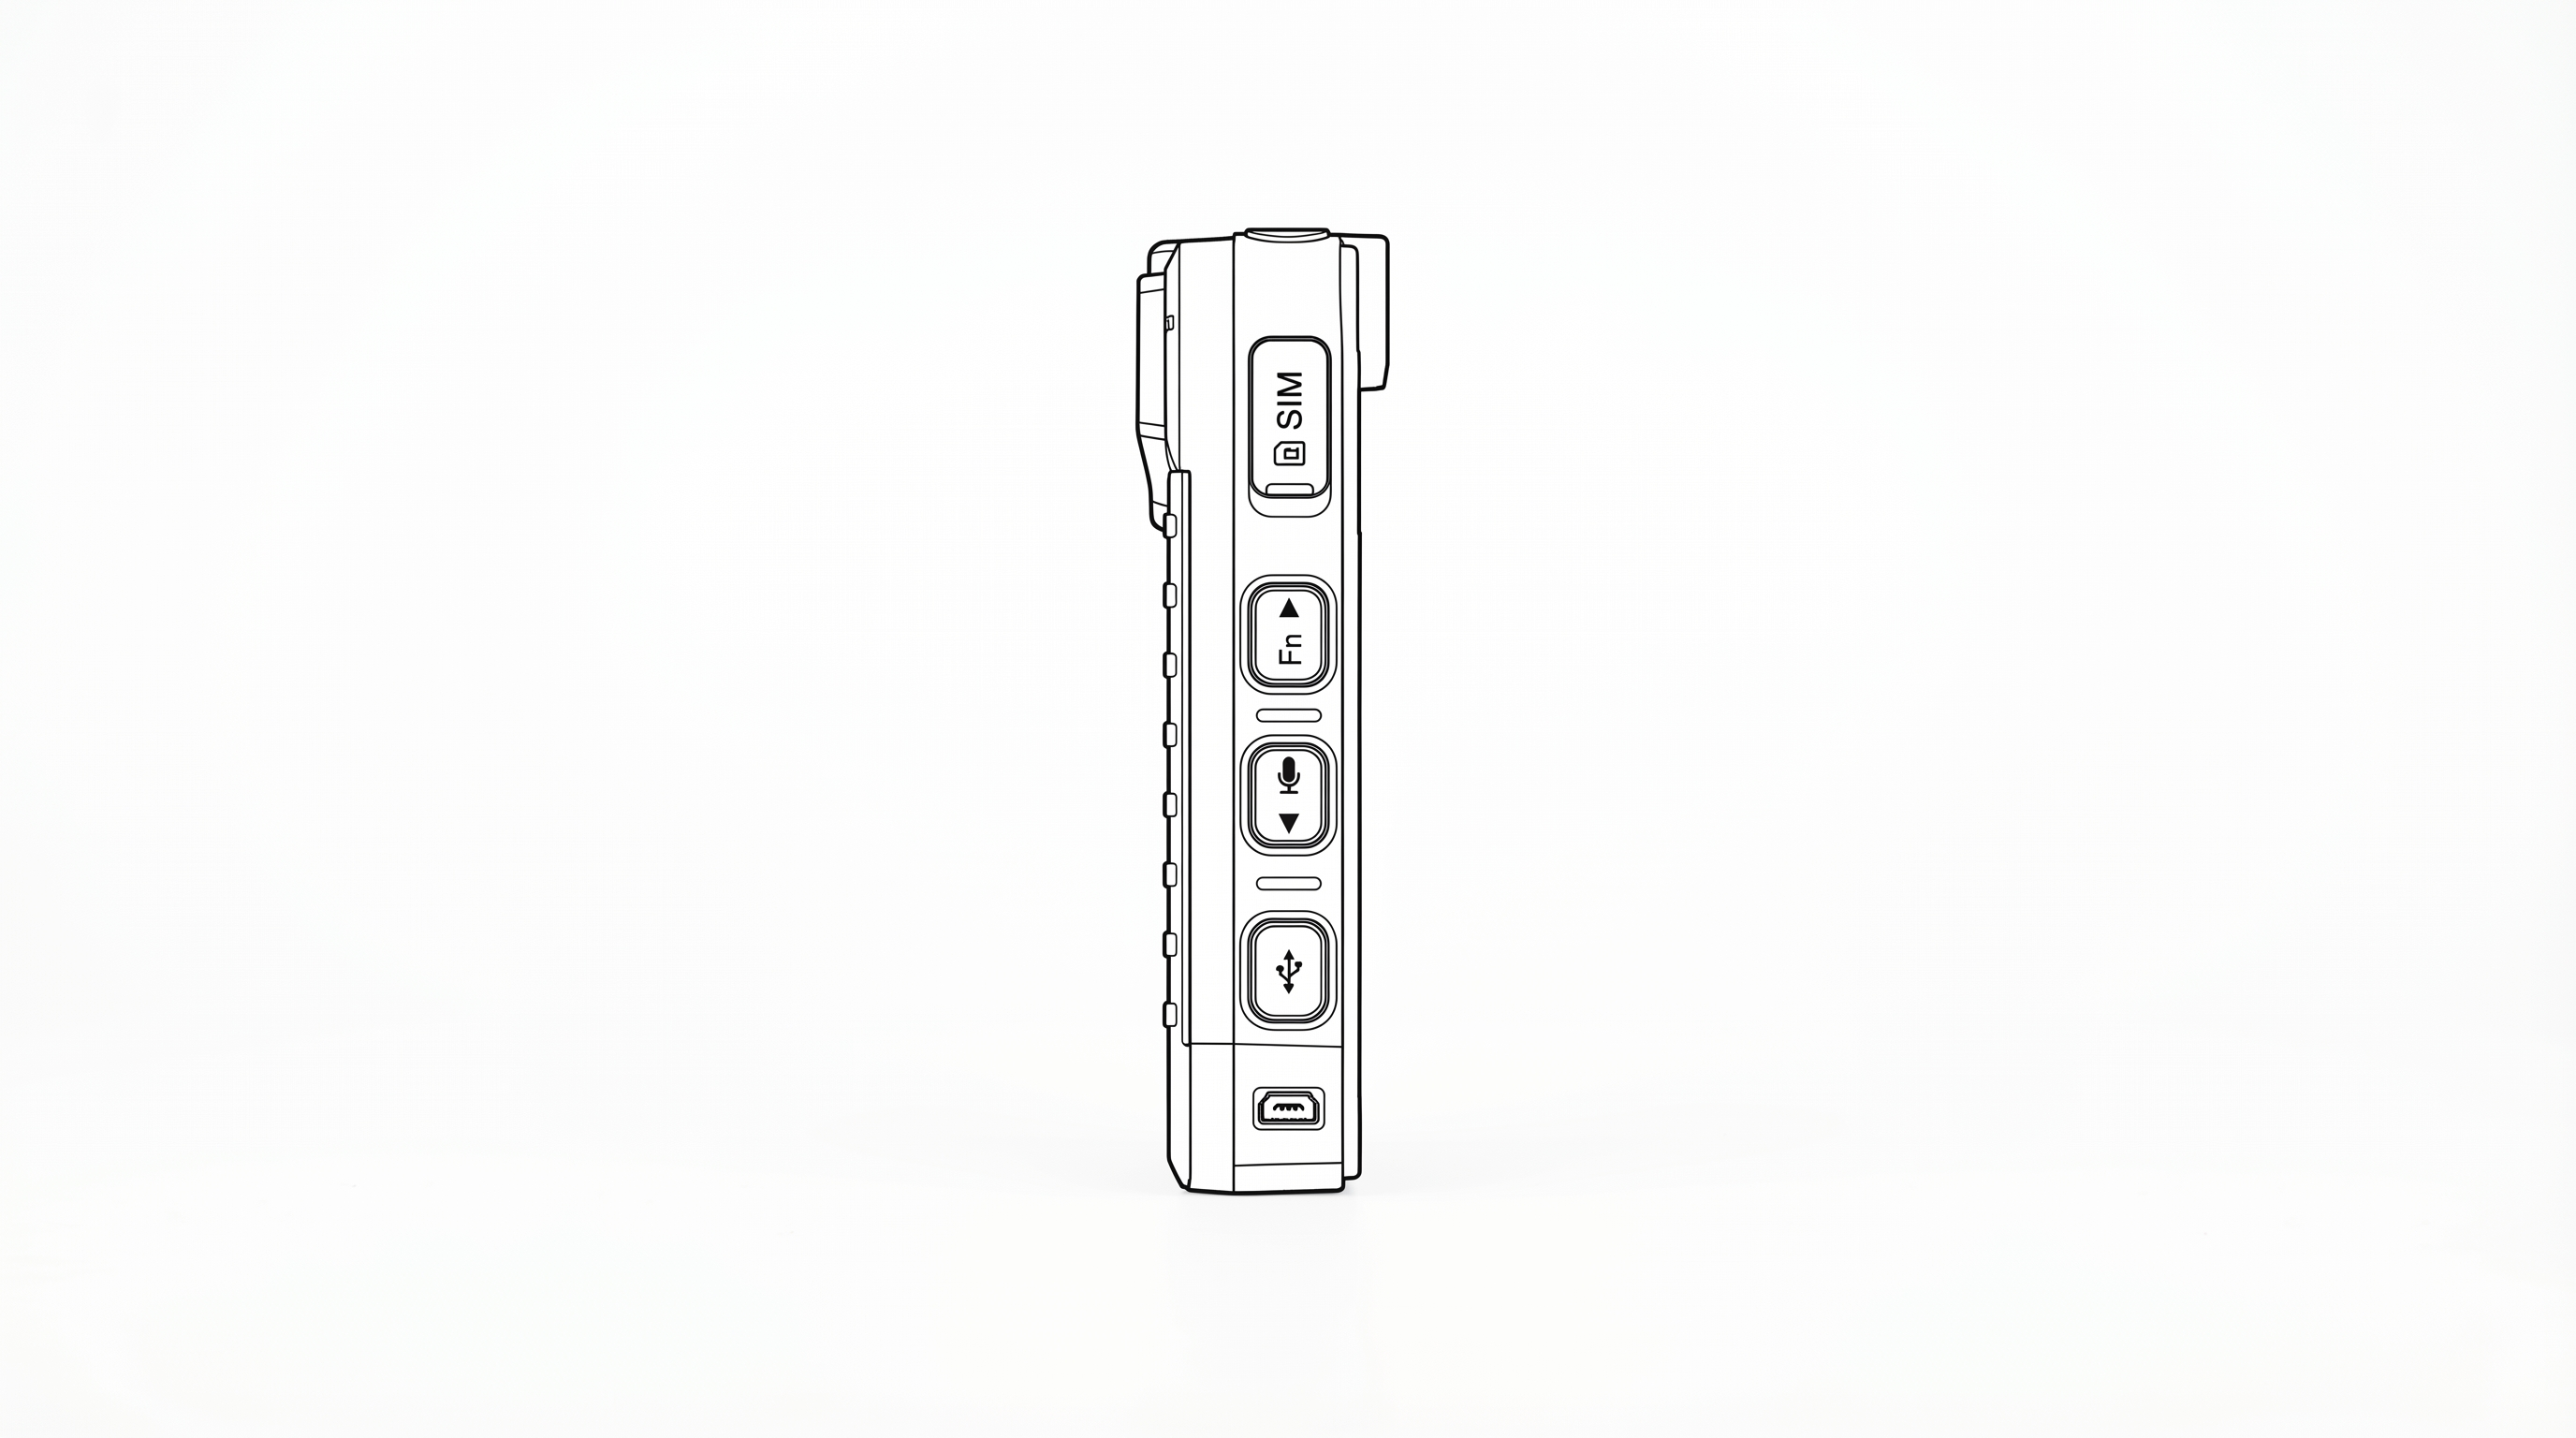
| Component | Description |
|---|---|
| SIM Card Slot | Behind protective cover (labeled "SIM"). For LTE nano-SIM card |
| Fn / Up Button | Volume up |
| Mic / Down Button | Volume down |
| Night Vision Button | Below Mic/Down. Toggle infrared night vision on/off |
3.4 Top View
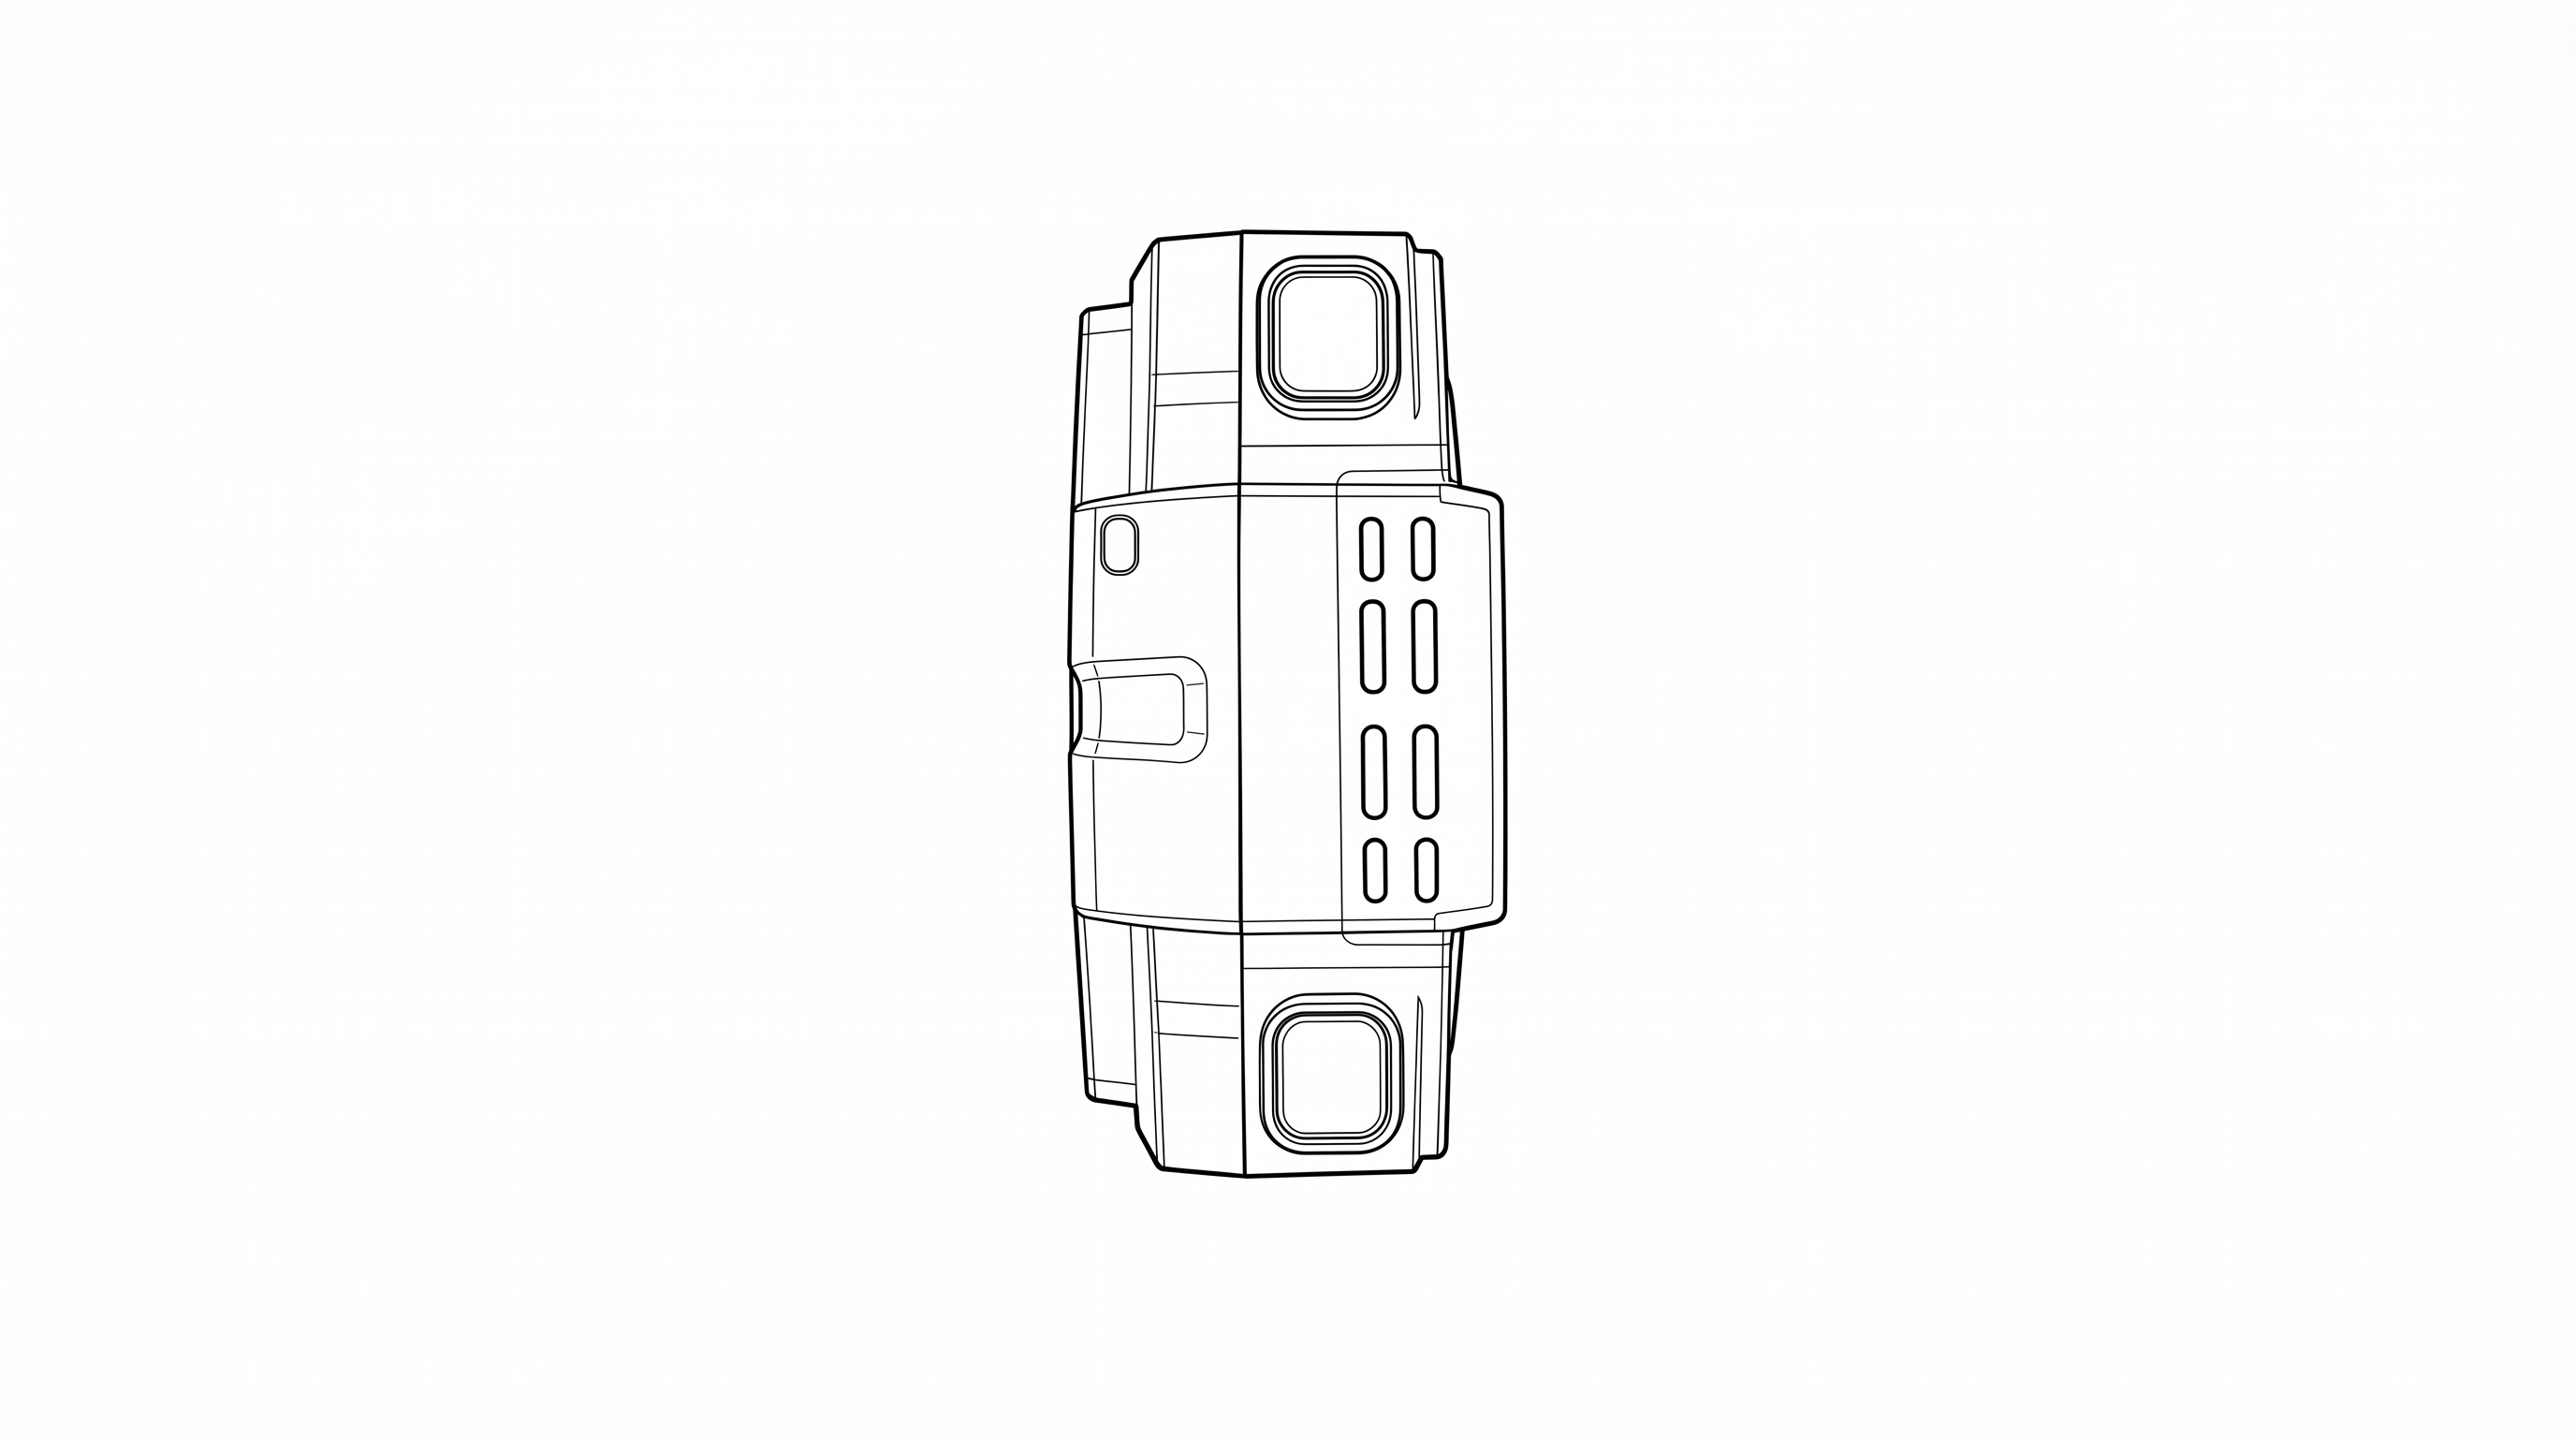
| Component | Description |
|---|---|
| Speaker | Speaker grille for audio playback and system sounds |
| Top-Right Button (Event) | Same as front Main Button. Short press: LiveAI trigger. Long press: Start/Stop event recording |
| Top-Left Button (SOS / AI) | Short press: Toggle AI on/off/low. Long press: Activate/Deactivate Panic/SOS mode |
3.5 Bottom View
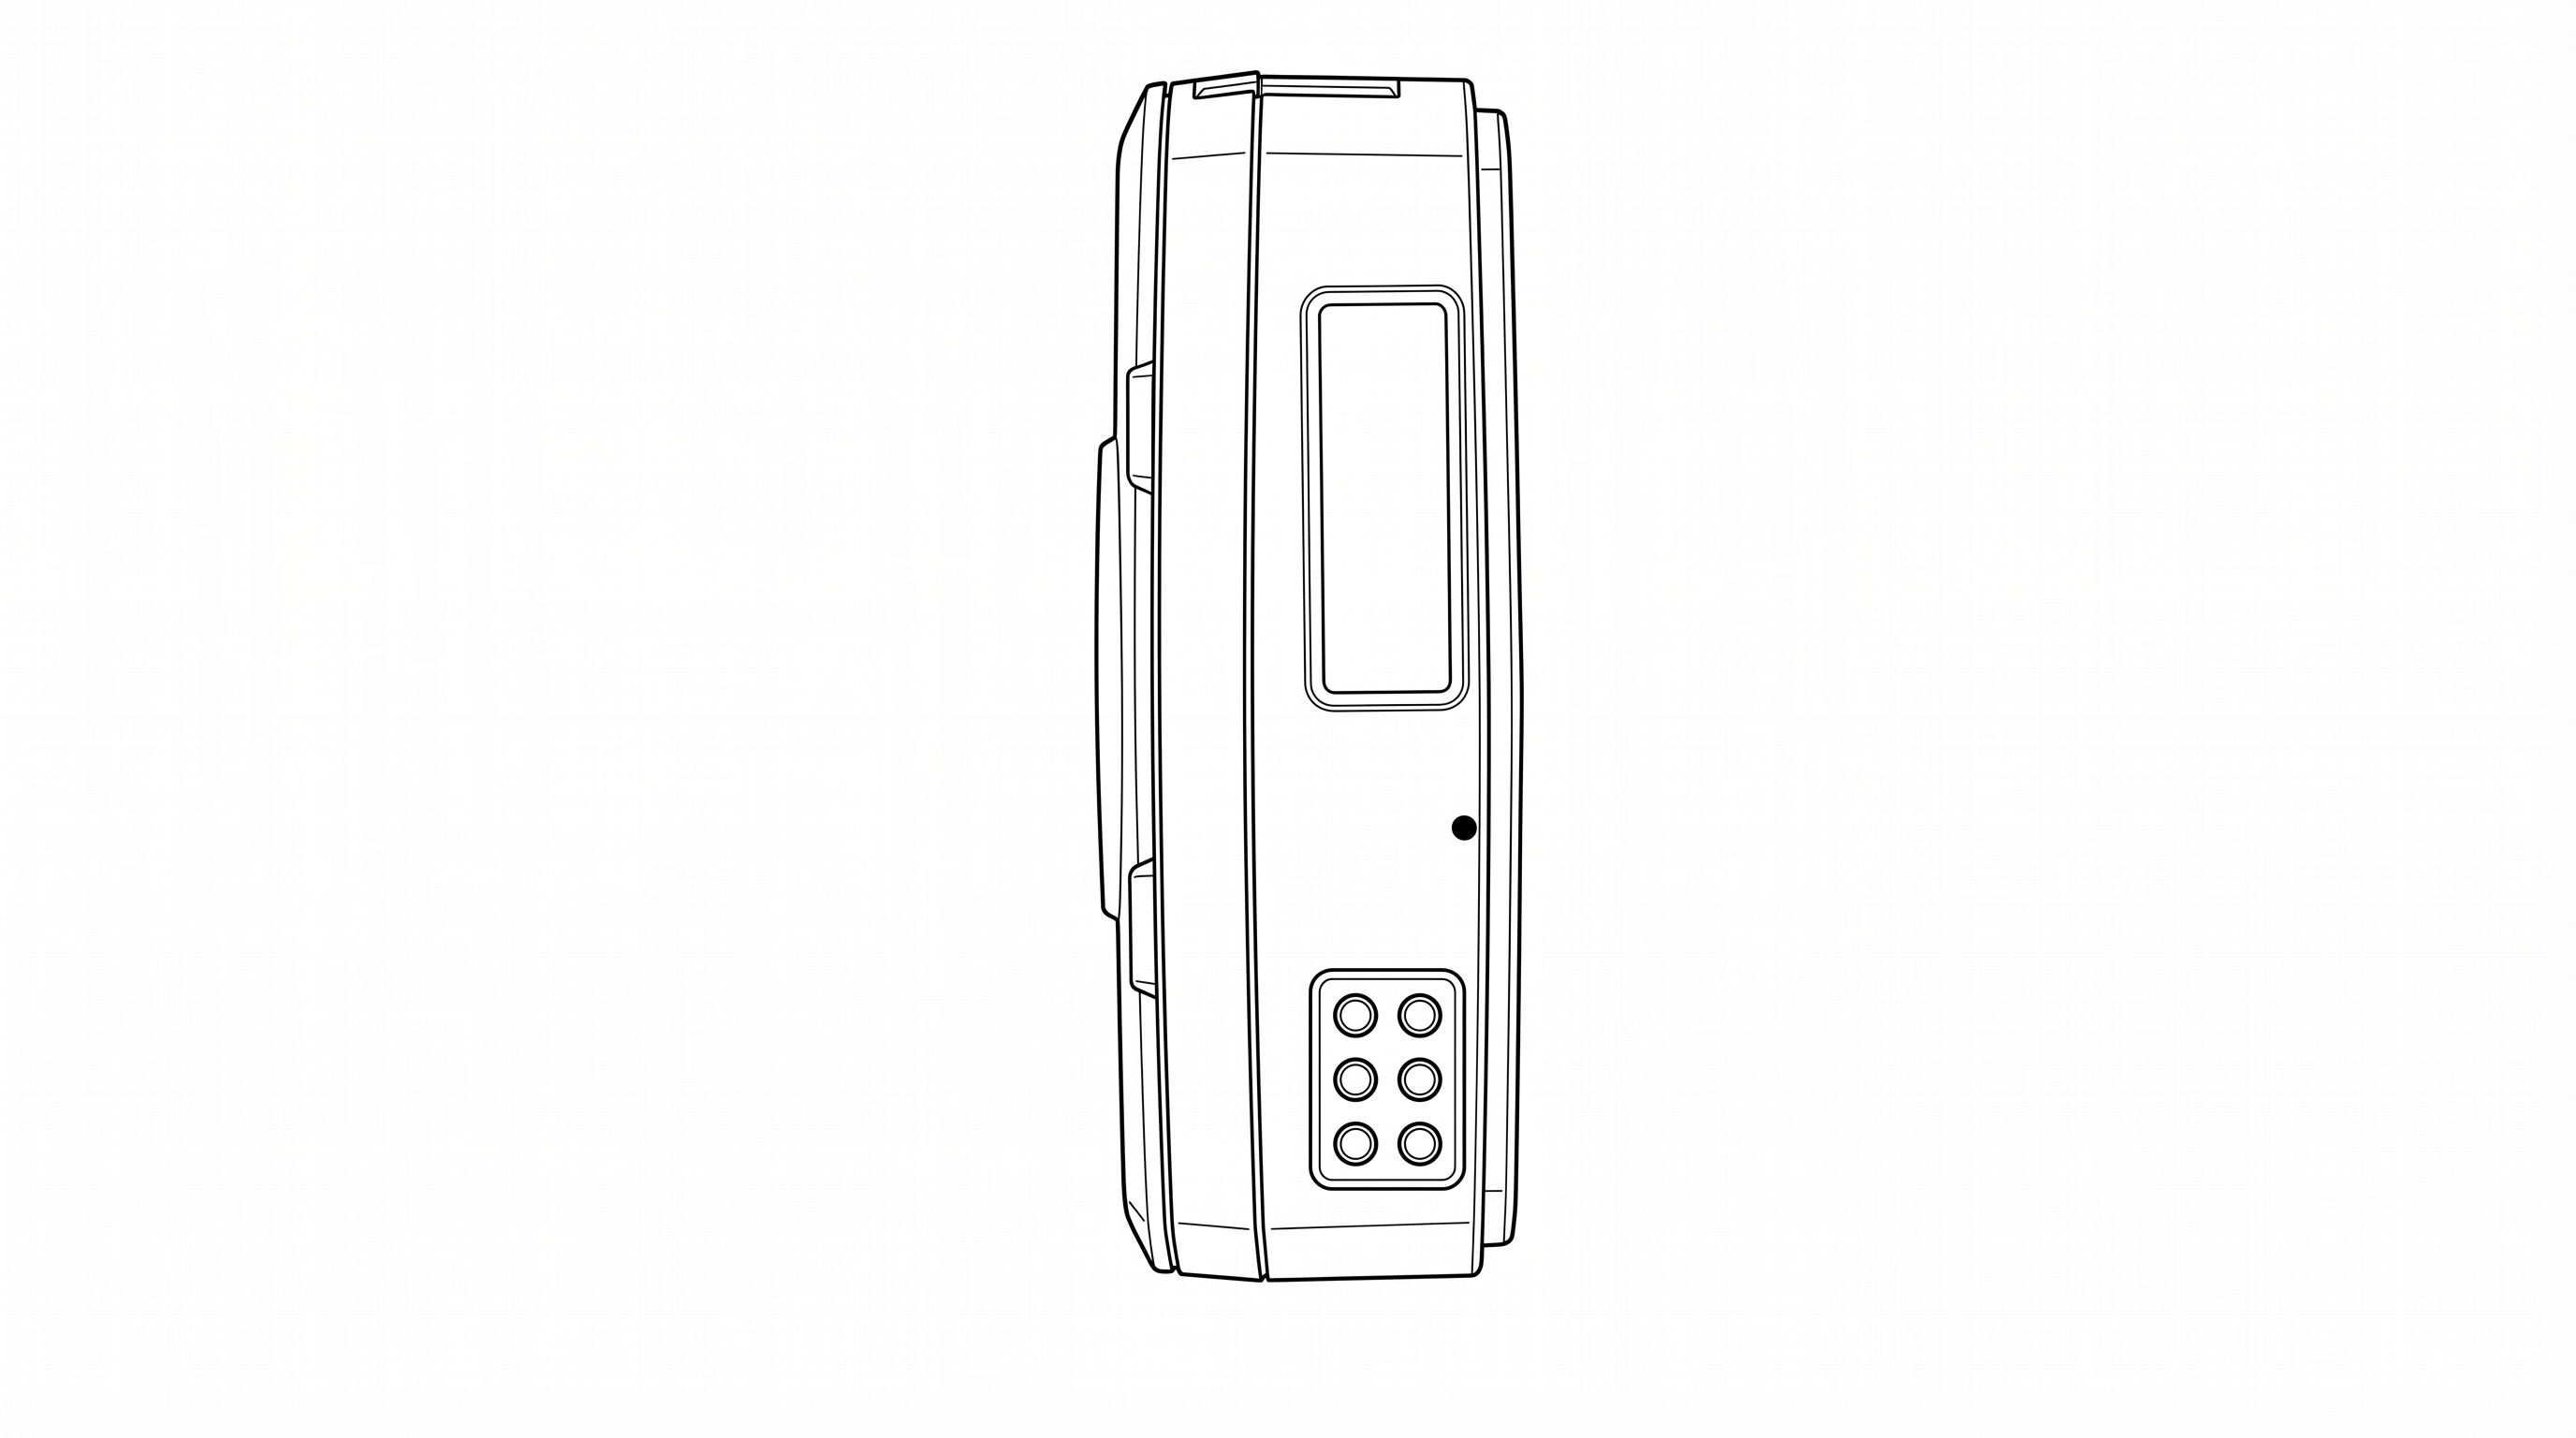
The bottom features a 6-pin pogo connector for use with the charging cradle.
3.6 Rear View
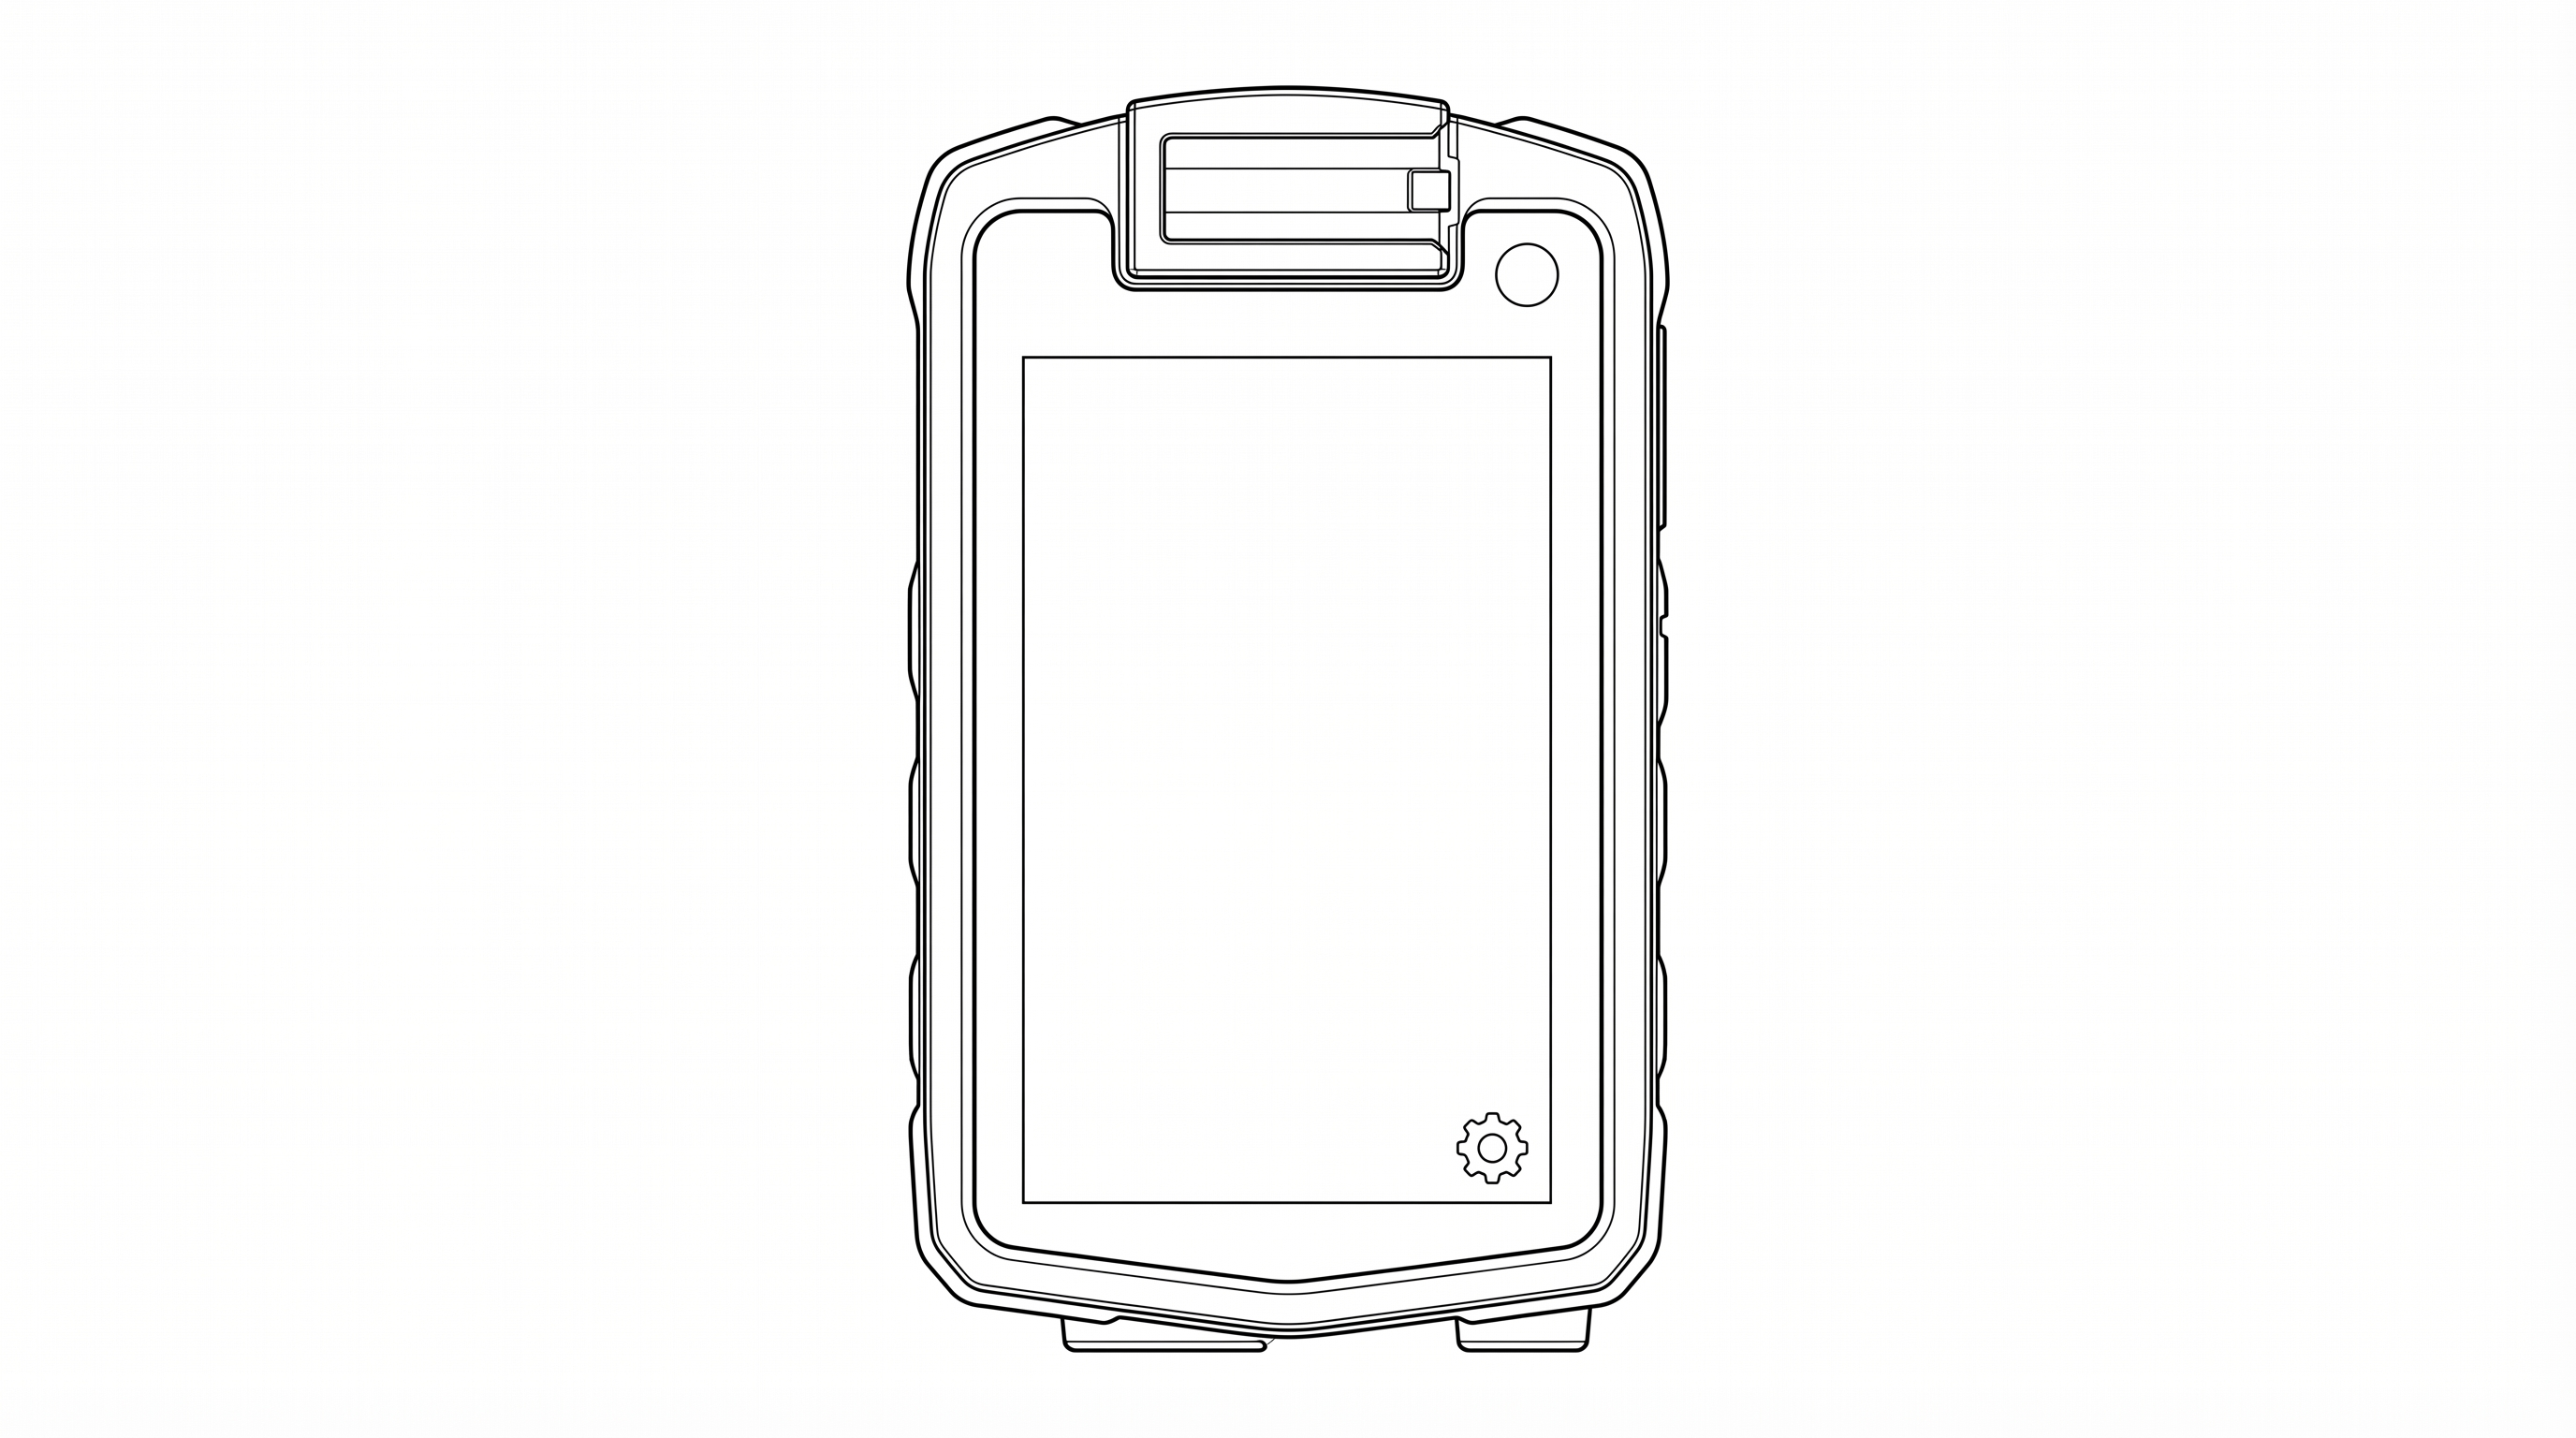
The rear of the device features a 3.1" IPS capacitive touchscreen display (480 x 800 pixels) used for system status, login, and settings. The rotating clip mount attaches at the top of the rear panel. A settings icon is visible at the bottom-right of the screen. Settings can be accessed before login if necessary.
4. Getting Started
4.1 Installing the SIM Card
- Power off the device.
- Locate the SIM card slot on the left side of the device (labeled "SIM").
- Open the protective cover by sliding it in the direction indicated.
- Insert a nano-SIM card with the contacts facing down and the notched corner oriented as shown on the slot label.
- Push the SIM card gently until it clicks into place.
- Close the protective cover securely.
4.2 Installing the Battery
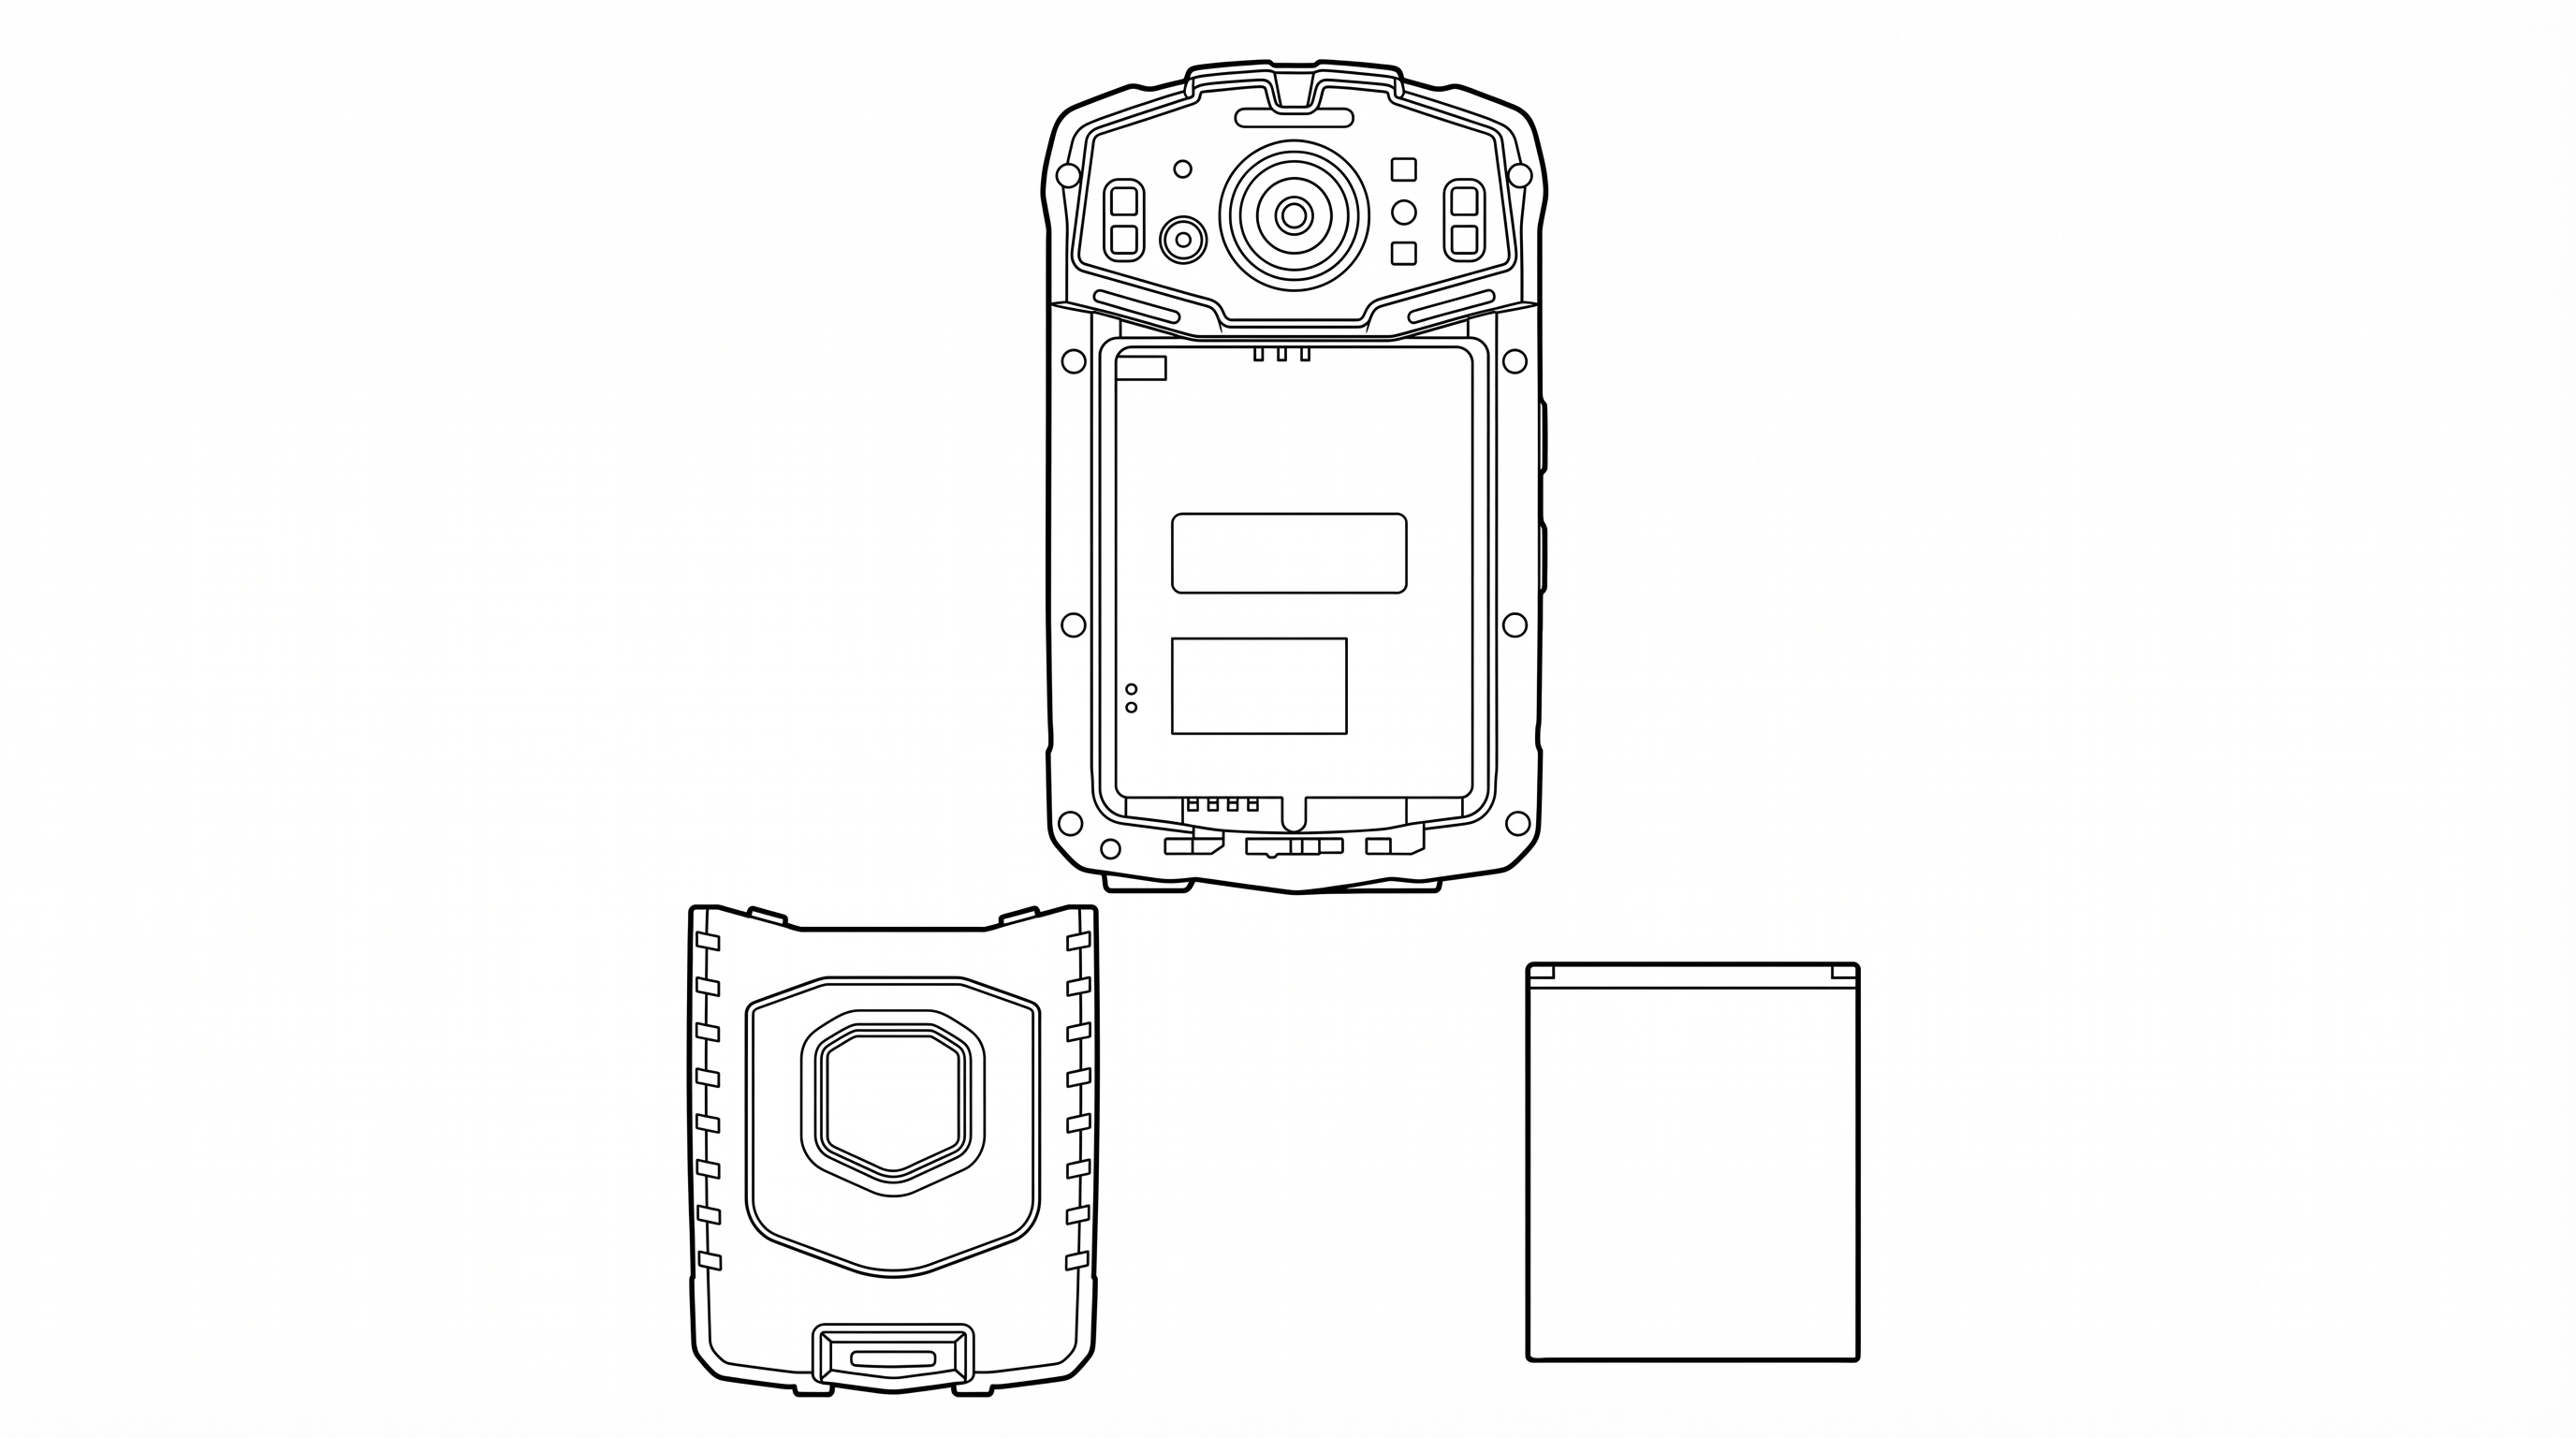
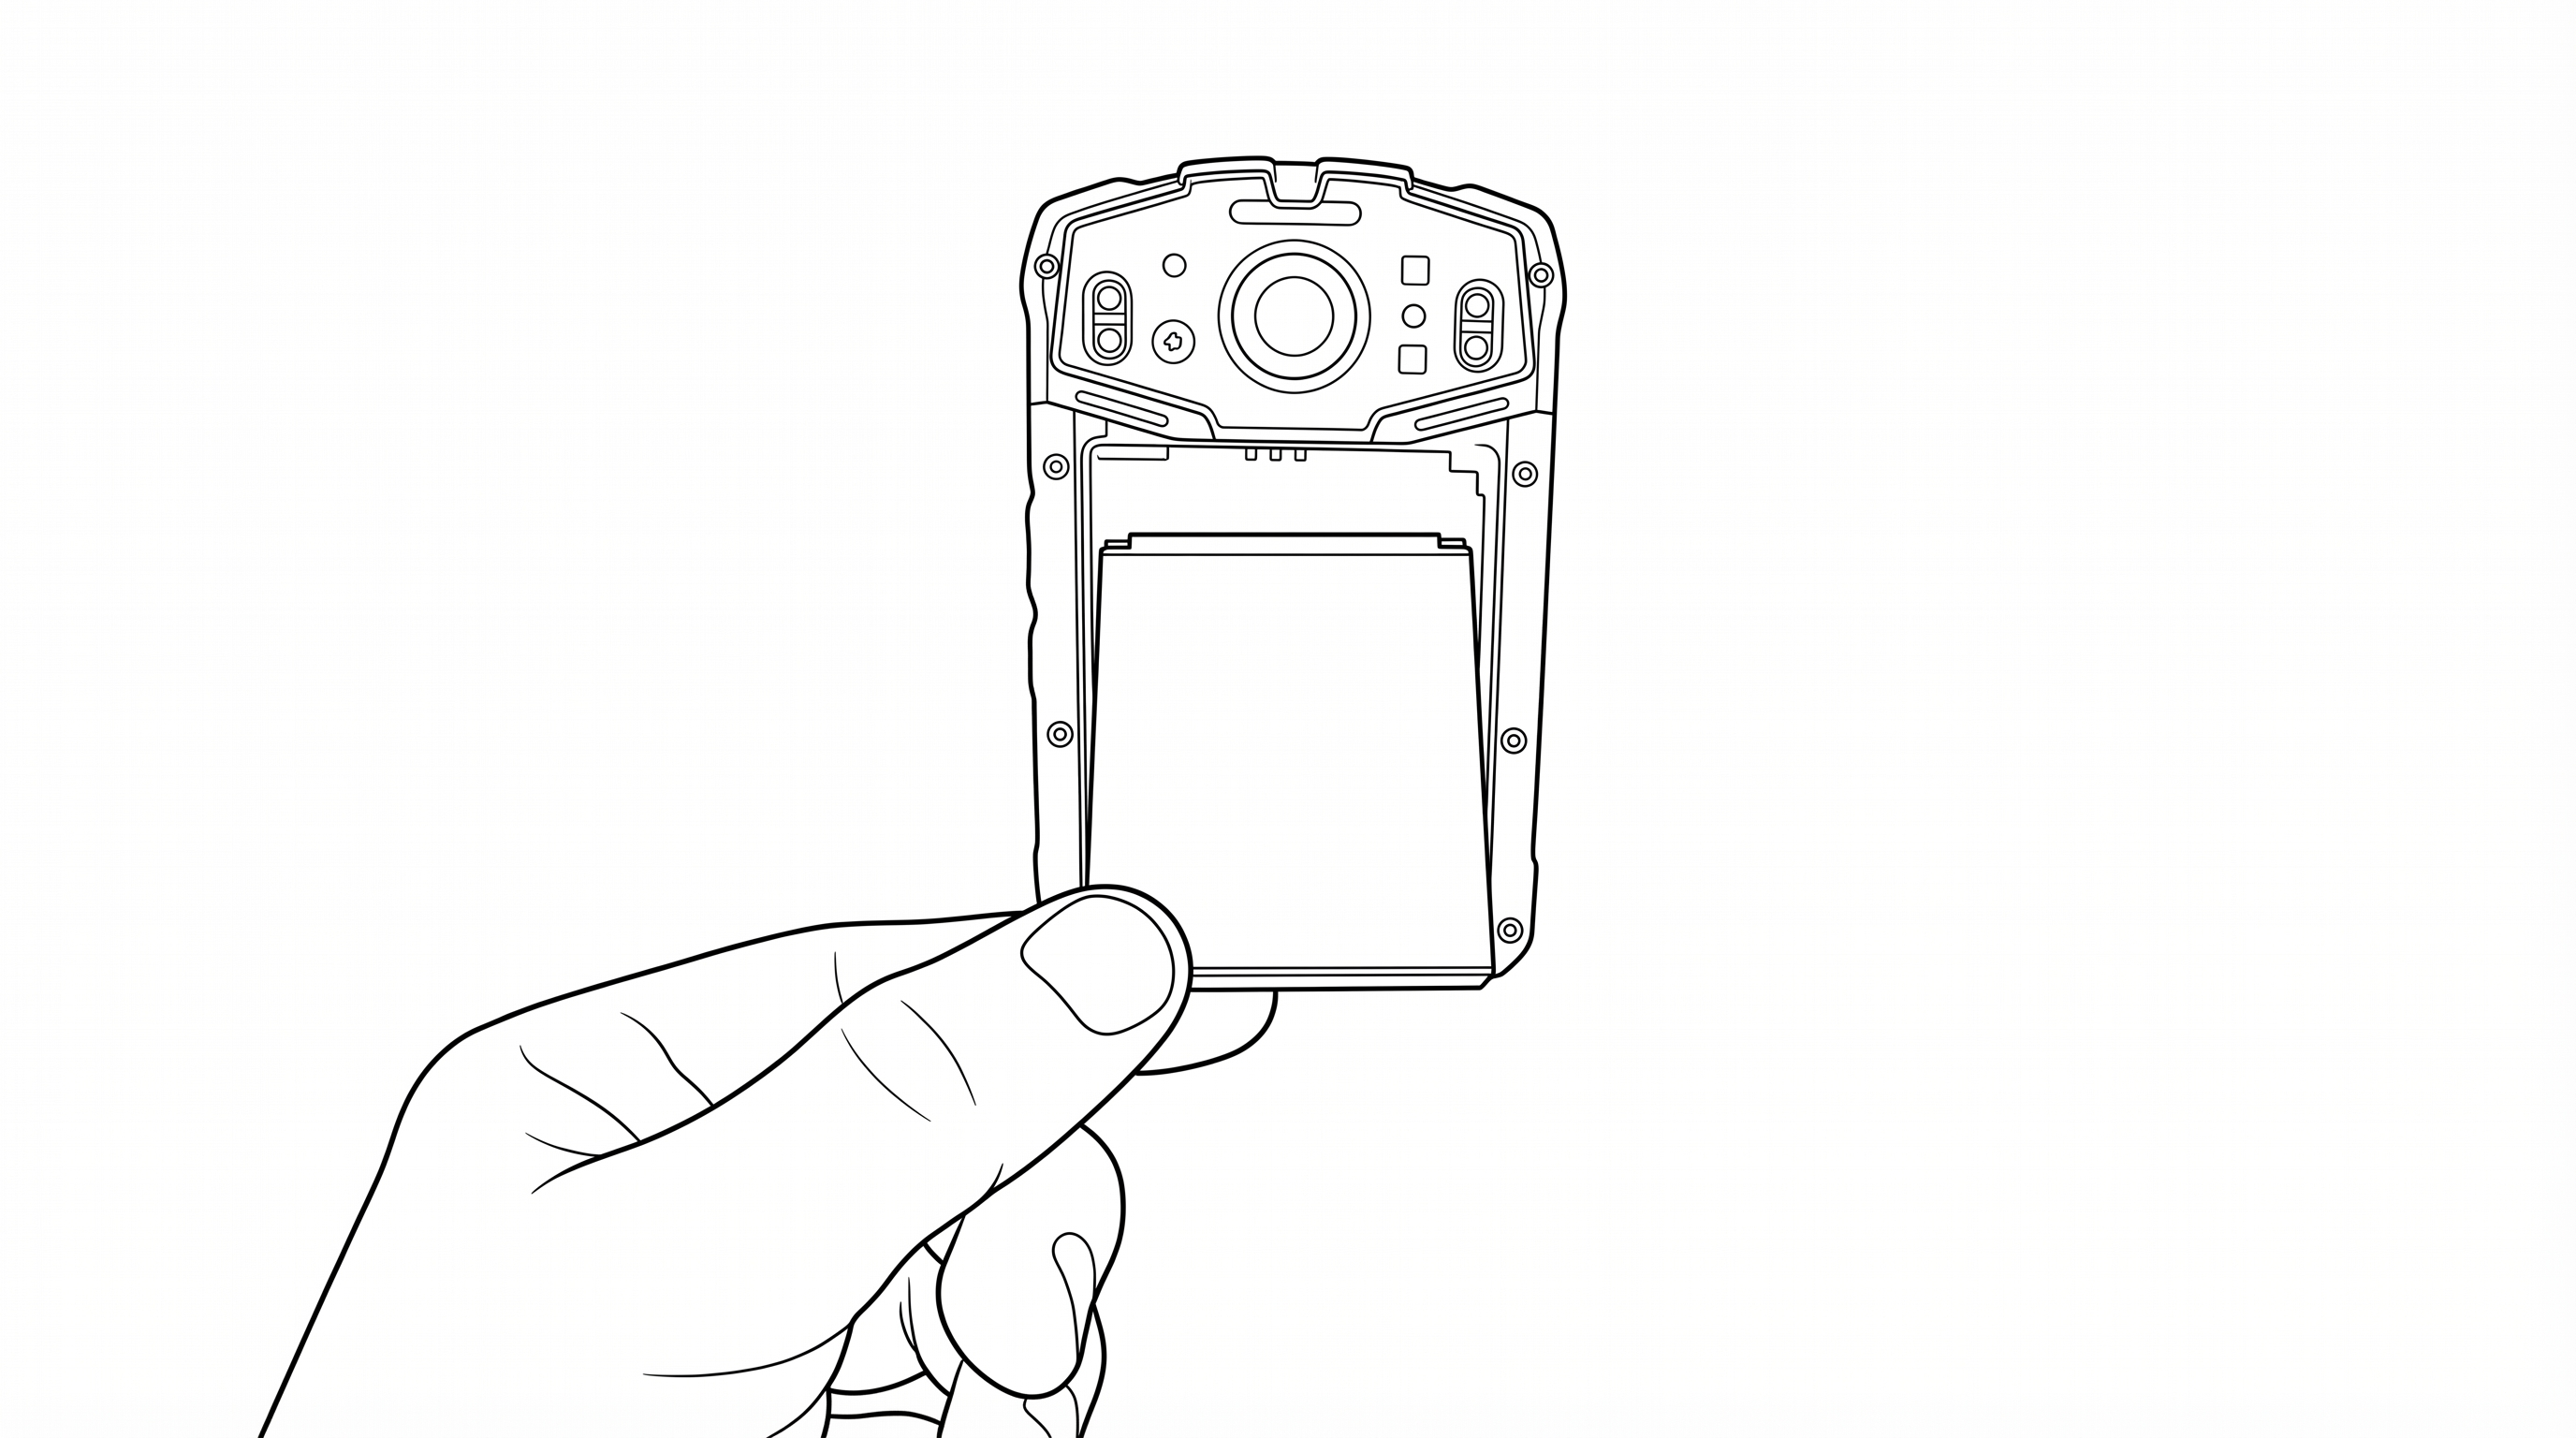
- Power off the device if it is on.
- Place the device face-up on a clean surface.
- Slide the front cover latch to the left to unlock, then lift and remove the front cover from the device body.
- Orient the battery with the positive (+) and negative (-) terminals matching the markings inside the battery compartment.
- Insert the battery into the compartment, contacts first, and press down until it seats firmly.
- Replace the front cover by aligning it onto the device body, pressing down firmly, and sliding the latch to the right as far as it will go. The latch is a compression slide — it will not click. Ensure the latch is slid fully to the right for proper operation and water tightness.
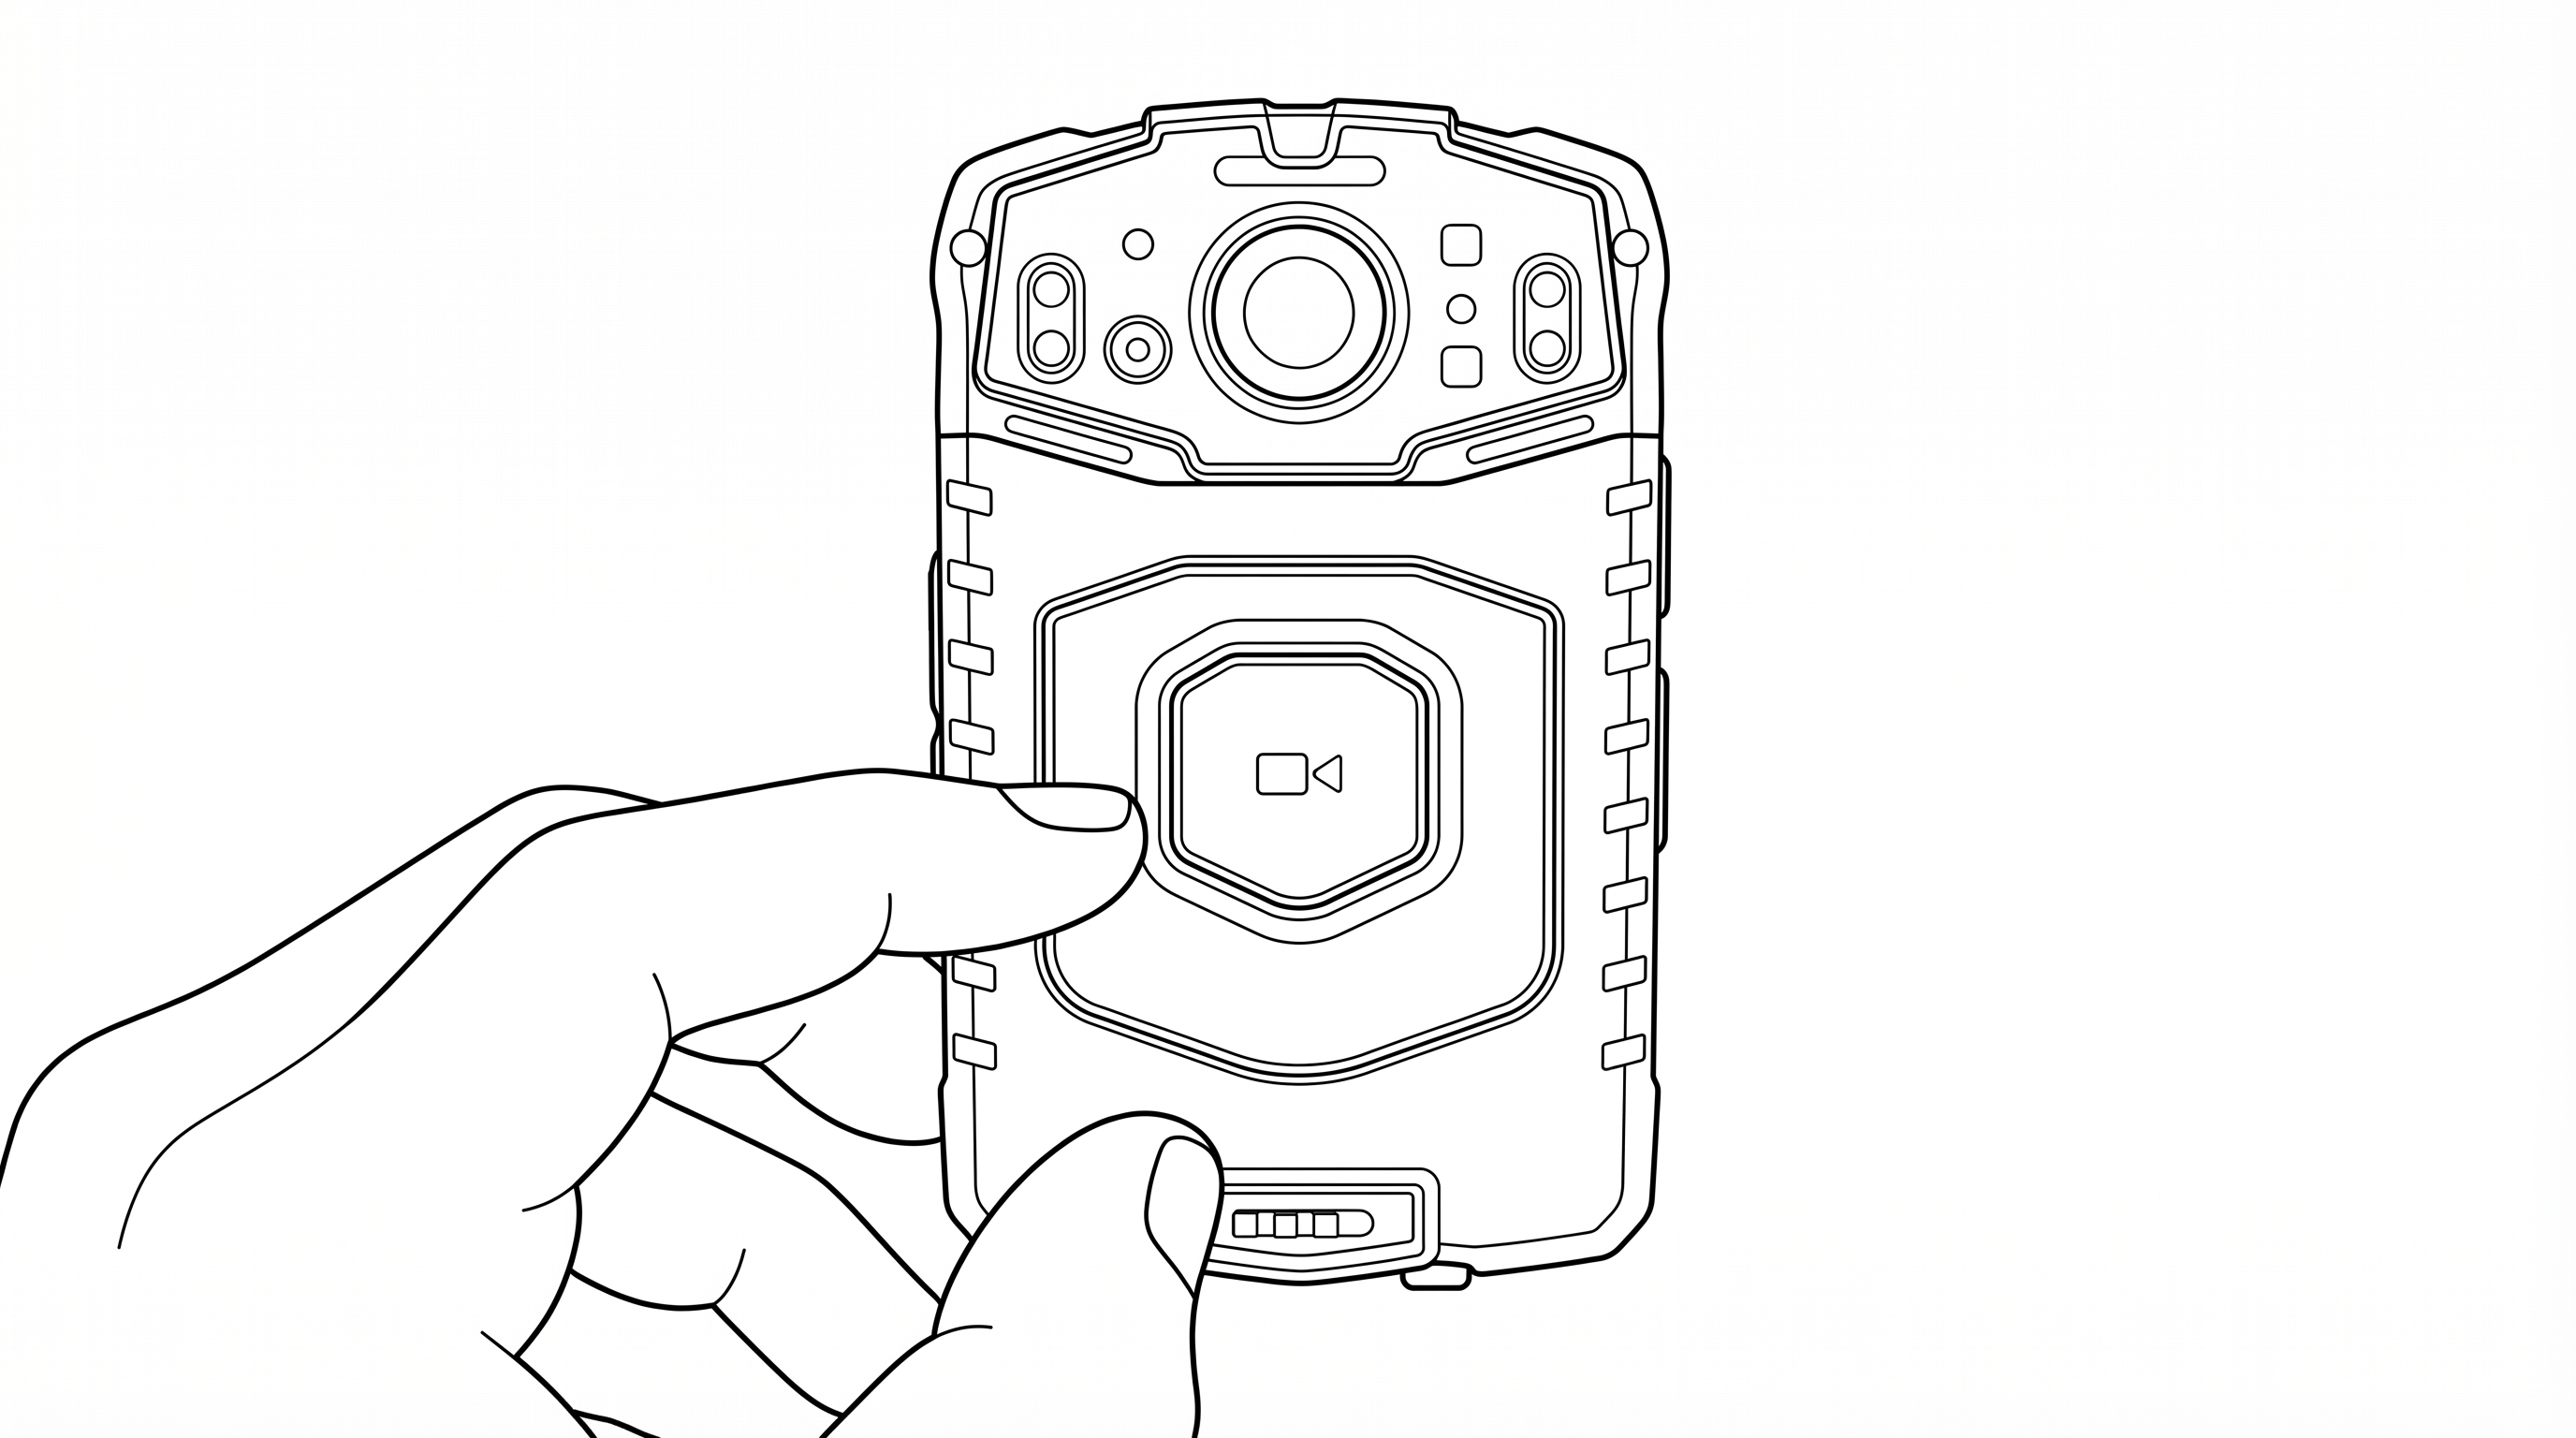
4.3 Charging the Device
The P1 can be charged two ways:
Method 1 — Charging Cradle (Recommended)
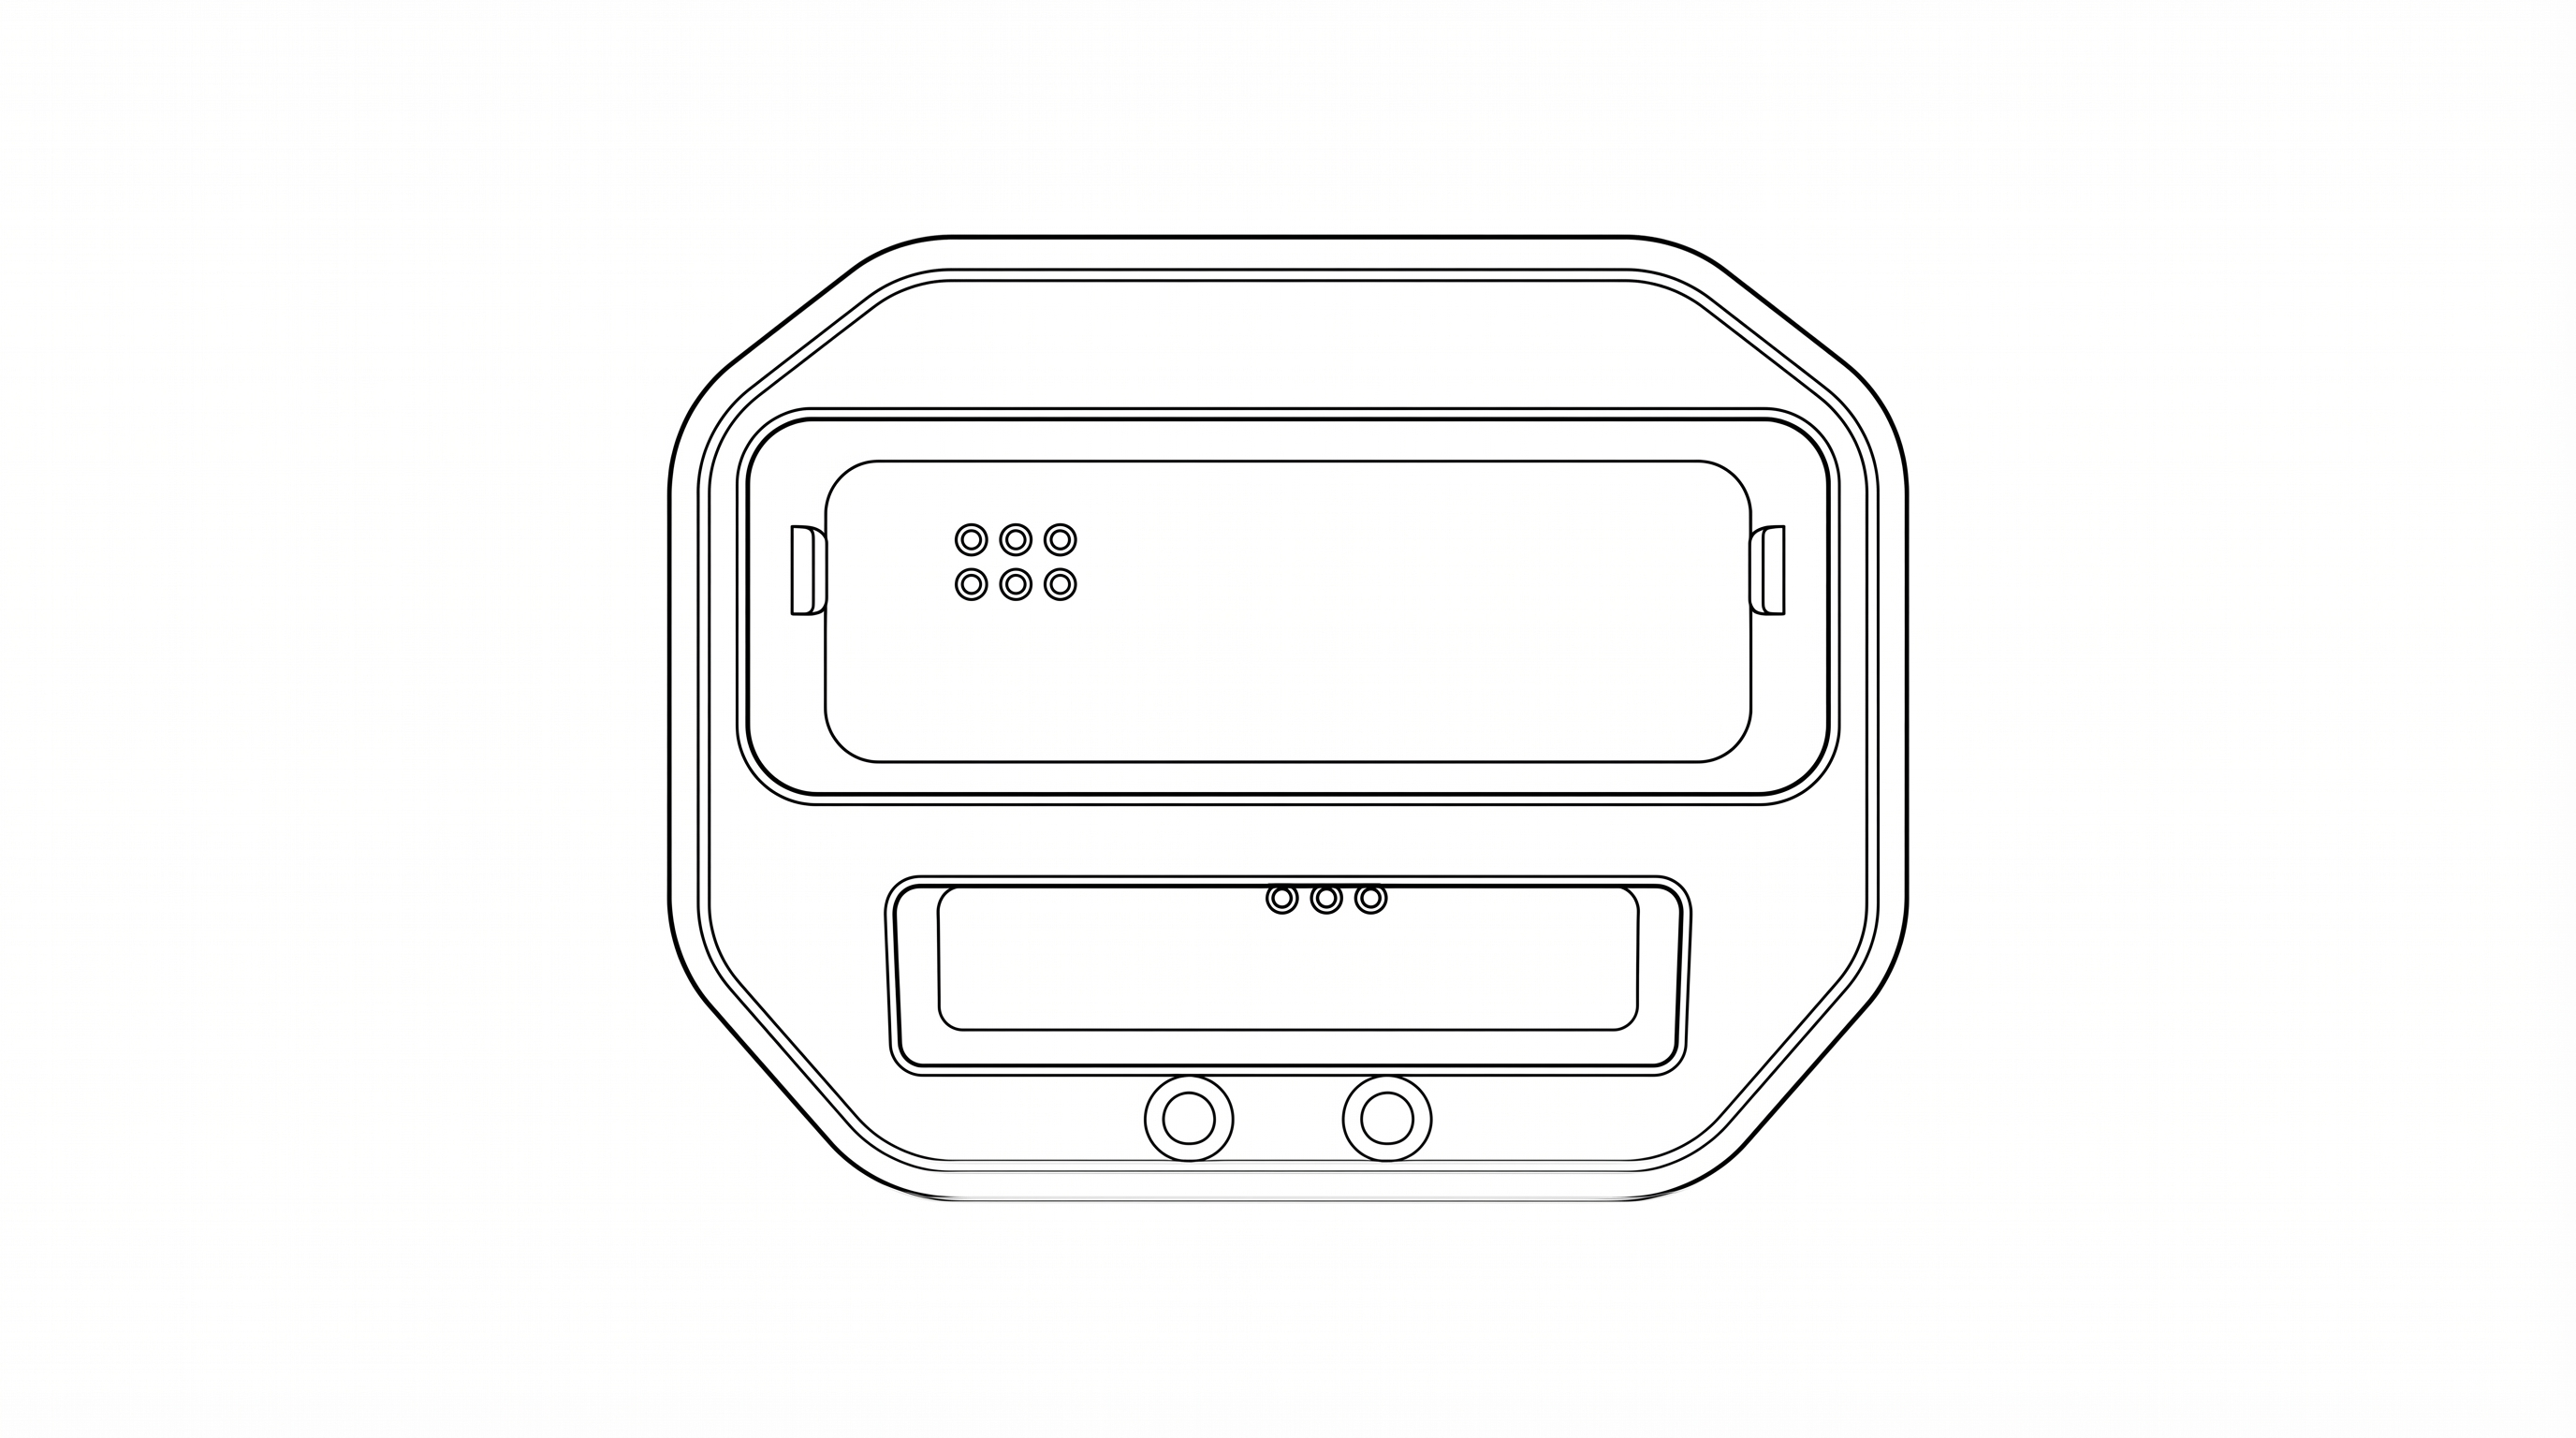
- Connect the USB-A to USB-C cable from the wall charger to the cradle.
- Place the camera into the main cradle slot, aligning the bottom pogo contacts.
- Optionally, place a spare battery in the secondary battery slot.
- The LED indicators will show the charging status (see below).
Charging Indicator Lights
| Location | Red LED | Blue LED |
|---|---|---|
| Camera LEDs (on device) | Camera battery charging | Camera battery fully charged |
| Cradle LEDs (on cradle) | Spare battery charging | Spare battery fully charged |
Method 2 — Direct USB-C Cable
- Open the USB-C port cover on the right side of the device.
- Connect a USB-C cable from the wall charger directly to the device.
4.4 Powering On and Off
| Action | How |
|---|---|
| Power On | Long press the Power button (right side, bottom) for 3 seconds |
| Power Off | Long press the Power button for 3 seconds, then confirm on screen |
| Screen Sleep / Wake | Short press the Power button |
| Reboot | Long press the Power button and select Reboot from the on-screen menu |
5. Wearing the Camera
- Attach the rotating alligator clip to the rear mount point on the top of the device.
- Clip the camera to the center of your chest, on the outer layer of your uniform, at approximately sternum height.
- Adjust the clip rotation so the camera lens faces forward.
- Verify the camera is mounted vertically with the lens at the top and the Patrol 6 logo on the bottom.
The mount system supports:
- Rotating alligator clip — included, for direct uniform attachment
- Vest clip — included, for MOLLE vests and tactical gear
- Third-party accessory mount — standard mount point compatible with other body-worn accessories
6. Basic Operation
6.1 Recording a Patrol
Patrol recording is managed automatically by the PATROL6 software. When a user logs in with their PIN and confirms their site assignment, recording begins automatically. Recording continues until the patrol is ended through the on-screen interface.
6.2 Event Recording
Event recording captures high-priority incidents with elevated upload priority.
- Start Event: Long press the front Main Button or the top-right side button.
- Stop Event: Long press the same button again.
During an event, both the red and blue LEDs will be illuminated. Event footage is uploaded with critical priority.
6.3 Pausing and Resuming Recording
- Pause: Short press the Pause/Resume button (rectangular button, right side).
- Resume: Long press the Pause/Resume button.
During a pause, the LED indicators will show green/yellow. Audio and video recording are suspended while paused.
6.4 Taking a Photo
Short press the Snapshot button (right side, below the Pause button) to capture a still photograph. Photos are saved alongside the video evidence for the current patrol session.
Long press the Snapshot button to toggle stealth mode on or off. In stealth mode, all LEDs and screen backlight are turned off for covert operation while recording continues.
6.5 Night Vision
The P1 features infrared night vision for low-light and no-light environments.
- Toggle Night Vision: Press the Night Vision button (left side, below the Mic/Down button).
When activated, the IR LEDs illuminate the scene with infrared light invisible to the human eye, and the camera switches to IR capture mode.
6.6 LiveAI
The LiveAI assistant provides real-time situational awareness through voice interaction.
- Activate LiveAI: Short press the front Main Button or top-right side button.
6.7 Panic / SOS
In an emergency, activate the Panic/SOS function to immediately alert your dispatch center.
- Activate SOS: Long press the top red button on the left side to start.
- Deactivate SOS: Long press the top red button on the left side to stop.
This sends an immediate alert with your GPS location to the PATROL6 management platform.
6.8 Toggle AI Mode
The AI assistant can be set to different modes to control its level of engagement.
- Toggle AI On / Off / Low: Short press the top red button on the left side (same button as SOS).
7. LED Indicator Reference
Normal Operation (Not Charging)
| LED Color | Meaning |
|---|---|
| Red (solid) | Recording patrol video |
| Red + Blue (solid) | Recording an event (incident in progress) |
| Green / Yellow | Recording paused |
| Blue (solid) | Device is on but user is logged out |
Charging (USB Connected)
| LED Color | Meaning |
|---|---|
| Red (solid) | Battery charging in progress |
| Blue (solid) | Battery fully charged |
8. Button Reference
| Button | Location | Short Press | Long Press |
|---|---|---|---|
| Main Button | Front center | LiveAI trigger | Start / Stop event recording |
| Top-Right Button | Right side, top | LiveAI trigger (same as Main) | Start / Stop event recording (same as Main) |
| Top-Left SOS Button | Left side, top (red button) | Toggle AI on / off / low | Activate / Deactivate Panic / SOS |
| Fn / Up | Left side | Volume up | — |
| Mic / Down | Left side | Volume down | — |
| Night Vision | Left side, lower | Toggle IR night vision on/off | — |
| Pause / Resume | Right side (rectangular) | Pause recording | Resume recording |
| Snapshot | Right side | Capture still photo | Toggle stealth mode on / off |
| Power | Right side, bottom | Screen sleep / wake | Power off / Reboot |
9. Charging Cradle
The included charging cradle provides two charging functions:
- Camera Slot (main bay): Charges the P1 camera through the 6-pin pogo contacts on the bottom of the device. Align the camera and press down until it seats securely.
- Battery Slot (secondary bay): Charges a spare battery independently, so a fresh battery is always ready.
Setup:
- Place the cradle on a flat, stable surface.
- Connect the USB-C cable from the included 5V/2A wall charger to the cradle.
- Insert the camera and/or spare battery into their respective slots.
10. Technical Specifications
| General | |
|---|---|
| Model | P1 |
| Dimensions | 103 mm x 63 mm x 22 mm (without clip) |
| Weight (with battery) | 208 g |
| Weight (without battery) | 180 g |
| Display | 3.1" IPS Screen with Capacitive Touch (480 x 800 pixels) |
| Ingress Protection | IP67 (dust-tight, submersible to 1 m for 30 min) |
| Operating Temperature | -20°C to 55°C (-4°F to 131°F) |
| Camera and Recording | |
|---|---|
| Video Resolution | HD 1280 x 720 @ 25 fps (software-configured) |
| Video Codec | H.264 |
| Hardware Capability | Up to 2K resolution |
| Audio | AAC-LC, 44.1 kHz, mono |
| Night Vision | Infrared LEDs, manual on/off |
| Photo Capture | JPEG still photos |
| Field of View | 120° wide angle |
| Storage | |
|---|---|
| Internal Storage | 32 GB |
| SD Card Storage | 256 GB (pre-installed, non-removable) |
| Battery | |
|---|---|
| Type | Rechargeable lithium-ion |
| Capacity | 3200 mAh |
| Voltage | 3.8V DC |
| Charging Input | 5V / 2A via USB-C or pogo-pin cradle |
| Included Batteries | 2 (one in camera, one spare) |
| Wireless Communications | |
|---|---|
| LTE Cellular | Bands 2, 4, 5, 12, 17, 30, 66, 71 |
| Wi-Fi | 802.11 a/b/g/n/ac (2.4 GHz and 5 GHz) |
| Bluetooth | Bluetooth EDR + Bluetooth Low Energy (BLE) |
| NFC | Near Field Communication |
| GPS | Built-in GPS for location tracking |
| Antenna | Internal (integral, non-removable) |
| Power Adapter (Included) | |
|---|---|
| Manufacturer | Dongguan Kaisheng Electronic Technology Co., Ltd. |
| Model | M4-050200A1-ETL |
| Input | 100–240V AC, 50/60 Hz, 0.3A |
| Output | 5V DC, 2A |
| Cable | USB-A to USB-C, 1.0 m |
11. Safety Warnings and Precautions
Battery Safety
- Only use the PATROL6 lithium-ion battery provided with this device.
- Do not expose the battery to fire, extreme heat, or direct sunlight for prolonged periods.
- Do not puncture, crush, disassemble, or modify the battery.
- Do not short-circuit battery terminals.
- If the battery is swollen, leaking, or damaged, stop use immediately and contact PATROL6 support.
- Dispose of batteries in accordance with local regulations. Do not dispose of in household waste.
- Keep batteries out of reach of children.
Charging Safety
- Use only the included power adapter (5V/2A) or a UL-listed equivalent.
- Do not charge the device in wet or humid environments.
- Disconnect the charger during lightning storms.
- Do not cover the device while charging.
Device Safety
- Although rated IP67, do not intentionally submerge the device beyond its rating (1 meter, 30 minutes).
- Ensure all port covers (USB-C, SIM) are securely closed before exposure to water or dust.
- Do not operate the device outside its rated temperature range (-20°C to 55°C).
- Do not attempt to disassemble or repair the device. Refer servicing to PATROL6.
- The device may become warm during extended recording or charging. This is normal.
RF Safety
- This device transmits radio frequency (RF) energy. Observe any RF restrictions in hospitals, aircraft, or other sensitive environments.
- Do not use this device near blasting operations or in explosive atmospheres.
5G WiFi Safety
For U-NII devices (5G WiFi):
- Working temperature: -20°C to 55°C
- Working voltage: 3.8V ±15%
The device for operation in the band 5150–5250 MHz is only for indoor use to reduce the potential for harmful interference to co-channel mobile satellite systems.
12. FCC Regulatory Compliance
FCC Part 15 Compliance Statement
This device complies with Part 15 of the FCC Rules. Operation is subject to the following two conditions:
- This device may not cause harmful interference, and
- This device must accept any interference received, including interference that may cause undesired operation.
FCC Class B Digital Device Statement
This equipment has been tested and found to comply with the limits for a Class B digital device, pursuant to Part 15 of the FCC Rules. These limits are designed to provide reasonable protection against harmful interference in a residential installation. This equipment generates, uses, and can radiate radio frequency energy and, if not installed and used in accordance with the instructions, may cause harmful interference to radio communications. However, there is no guarantee that interference will not occur in a particular installation.
If this equipment does cause harmful interference to radio or television reception, which can be determined by turning the equipment off and on, the user is encouraged to try to correct the interference by one or more of the following measures:
- Reorient or relocate the receiving antenna.
- Increase the separation between the equipment and receiver.
- Connect the equipment into an outlet on a circuit different from that to which the receiver is connected.
- Consult the dealer or an experienced radio/TV technician for help.
FCC Caution
Any changes or modifications not expressly approved by the party responsible for compliance could void the user's authority to operate the equipment.
13. RF Exposure Information (SAR)
Specific Absorption Rate (SAR) Information
The SAR limit of USA (FCC) is 1.6 W/kg averaged over one gram of tissue. This model (FCC ID: 2BVFCP6-BC-V1) has also been tested against this SAR limit. The highest SAR value reported under this standard during product certification for use at the body is 0.964 W/kg.
RF Exposure Statement
This device complies with FCC RF exposure limits for an uncontrolled environment and is approved for body-worn operation with a minimum separation distance of 5 mm when used with the provided accessories.
This device supports simultaneous transmission and has been evaluated for compliance with FCC RF exposure requirements under such conditions.
The device does not provide any user-accessible controls for adjusting RF transmission parameters.
Only manufacturer-approved accessories may be used to ensure compliance with FCC RF exposure requirements.
14. FCC Label Location
The FCC ID label is located inside the battery compartment, under the battery. To view the label:
- Power off the device.
- Remove the front cover (slide latch to the left and lift off).
- Remove the battery.
- The FCC ID label is visible on the interior surface of the battery compartment.
The label contains the following information:
- FCC ID: 2BVFCP6-BC-V1
- Model: P1
- This device complies with Part 15 of the FCC Rules
Electronic Labeling: FCC identification is also accessible electronically through the device settings menu. Navigate to Settings > About Device to view the FCC ID and regulatory information on-screen.
15. Warranty and Support
Manufacturer:
Patrol 6, Inc.
2843 E. Robin Lane
Phoenix, AZ 85050 USA
For technical support, warranty claims, or replacement parts, contact PATROL6:
- Website: www.patrol6.com
- Email: support@patrol6.com